menu
menu
Menu
1/ Go to console.developers.google.com
2/Login your google account & create a project:
#Press on Create a Project.
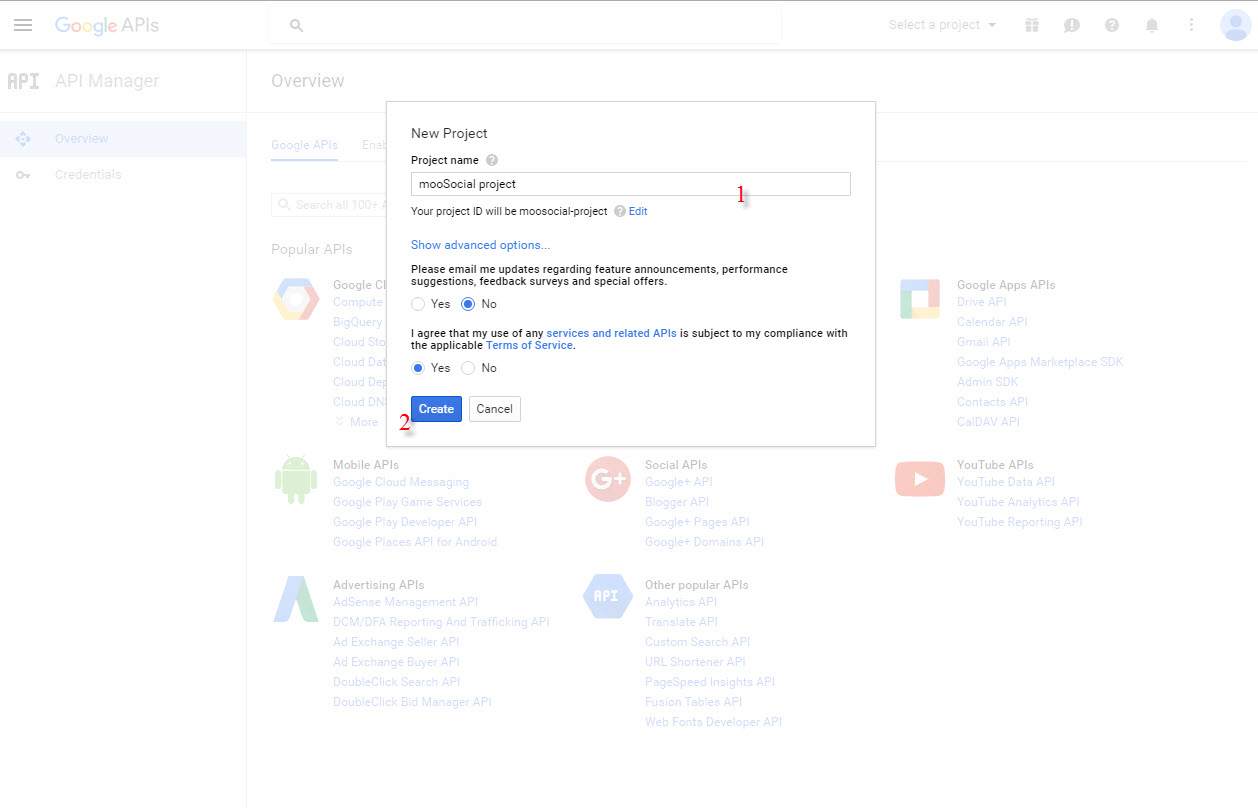
3/Fill in your Project’s Name :

#1 Fill your project’s name
#2 Create
*Agree to Terms and Conditions if they’re showing up.
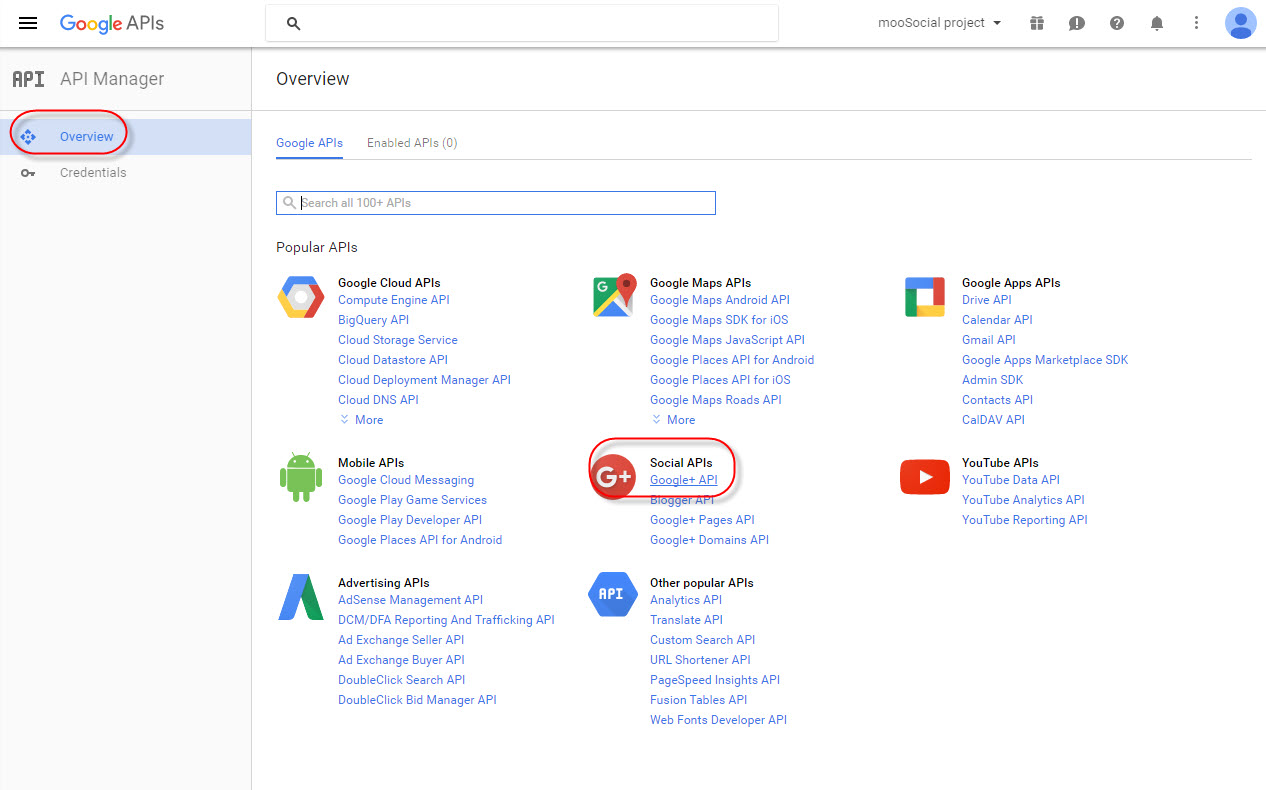
4/After your project is done creating, go to API Manager/Overview of your project :

Select Google+ API
5/Enable your Google+ API:
#Press on Enable API to enable.
6/Choose Credentials tab, hover mouse on Create credentials button and choose OAuth client ID:
7/We have to configure consent screen first:
#Press on Configure consent Screen then continue
8/Register at your Consent Screen :
#1 Check your Email
#2 Enter your Product’s name
#3 Save
9/Once you had registered your consent screen, Start Creating Client ID :
#1 Select Web Application
#2 Enter your site’s domain
#3 Enter your callback’s URL, this URL has the format: [yoursite/social/auths/endpoint/google?hauth.done=Google]
#4 Create Client ID
10/ Review your Client ID, it should be looked like this:
#Your Client ID
11/ On Credentials tab, click on credential name hyperlink, start configuring:
The Client Id on Google:
-Copy 1, 2, 3 to your settings Admin Dashboard/Socials Integration/Google one by one.
-Copy 1, 2, 3 to your settings Admin Dashboard/Socials Integration/Google one by one.
-Enable, check!
-Save Settings
*Remember to check if any space in the fields.
*Remember your site could be [https] instead of [http], they will not recognize if site was [https] and Client ID & Admin Dashboard were [http].
* Both sides, Admin Dashboard and Client ID must be configured synchronously for the 1, 2, 3, they must be same to each others.


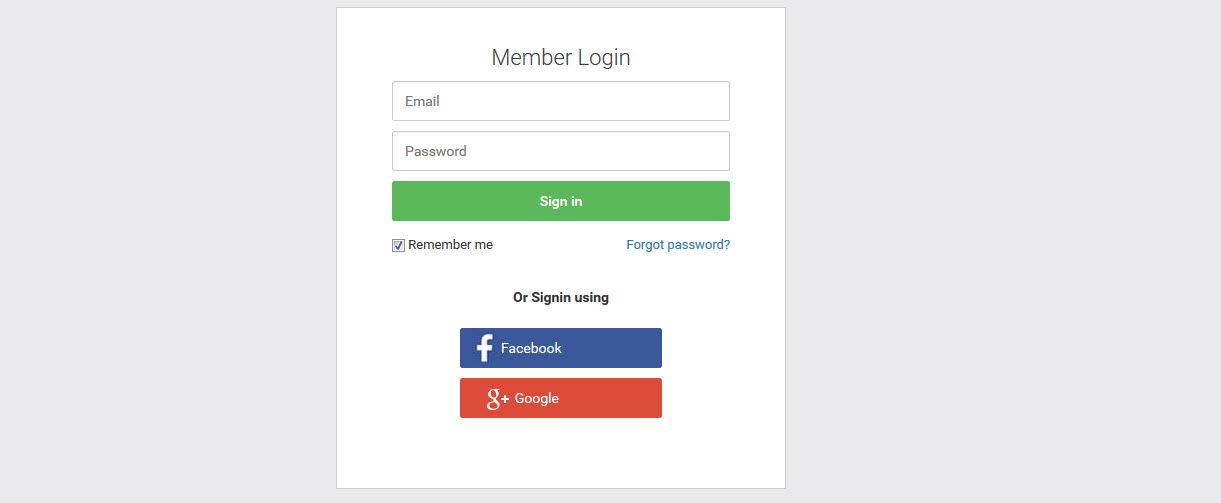
Your Login Page and Sign Up Page should be looking like this, with Facebook and Google button
