menu
menu
Menu
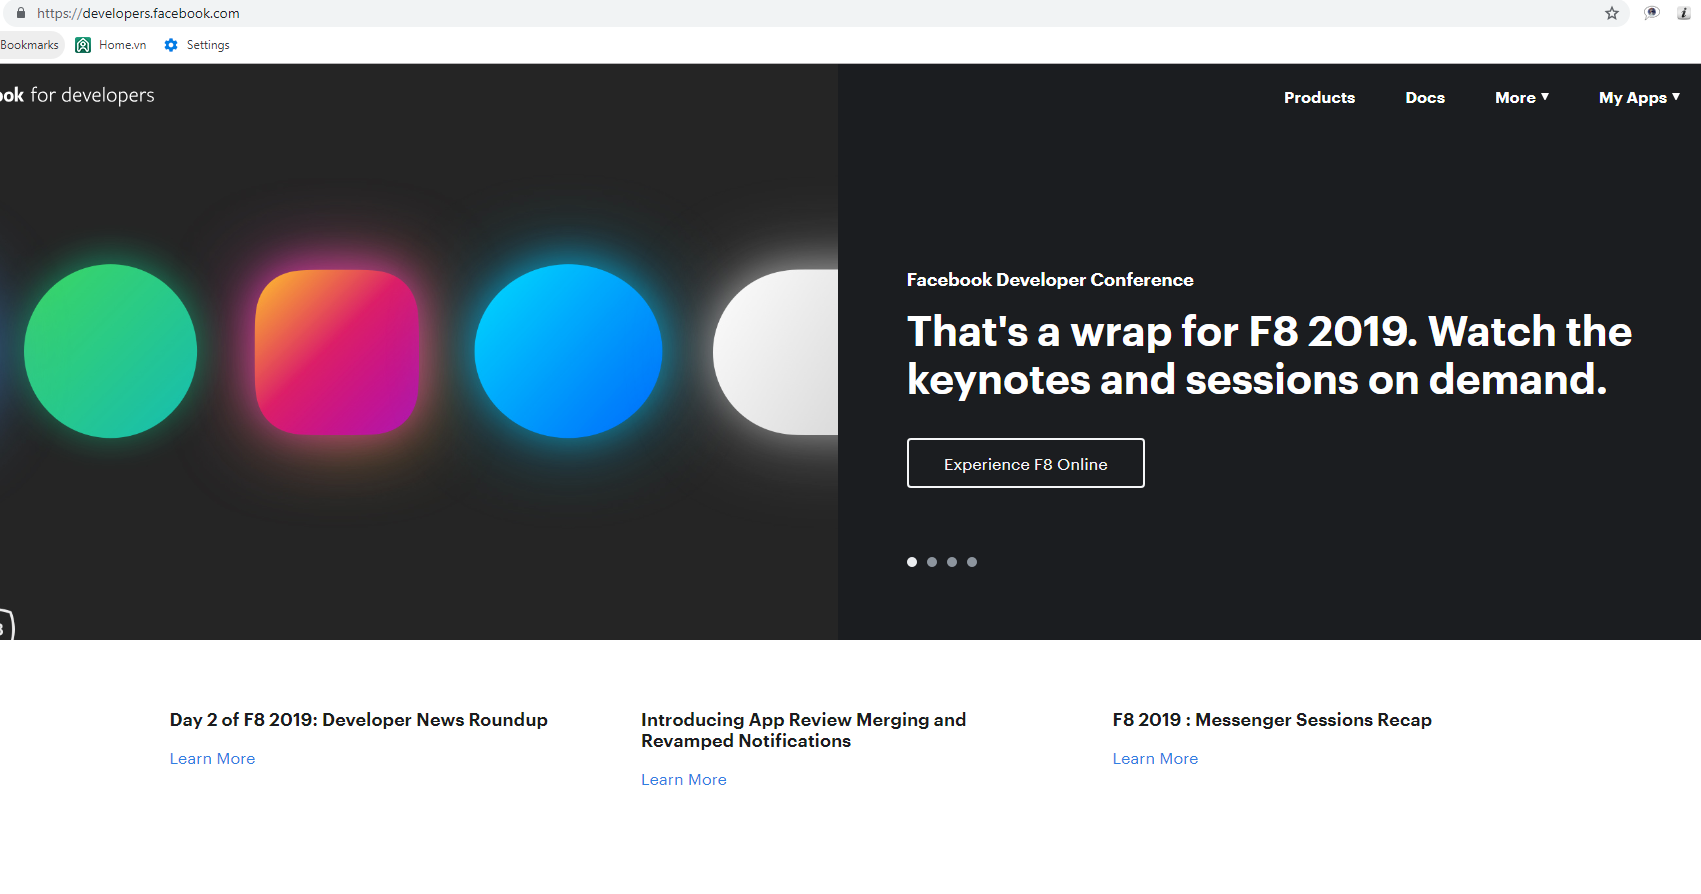
1. Go to developers.facebook.com
2. Login & Select My Apps --> Add a New App
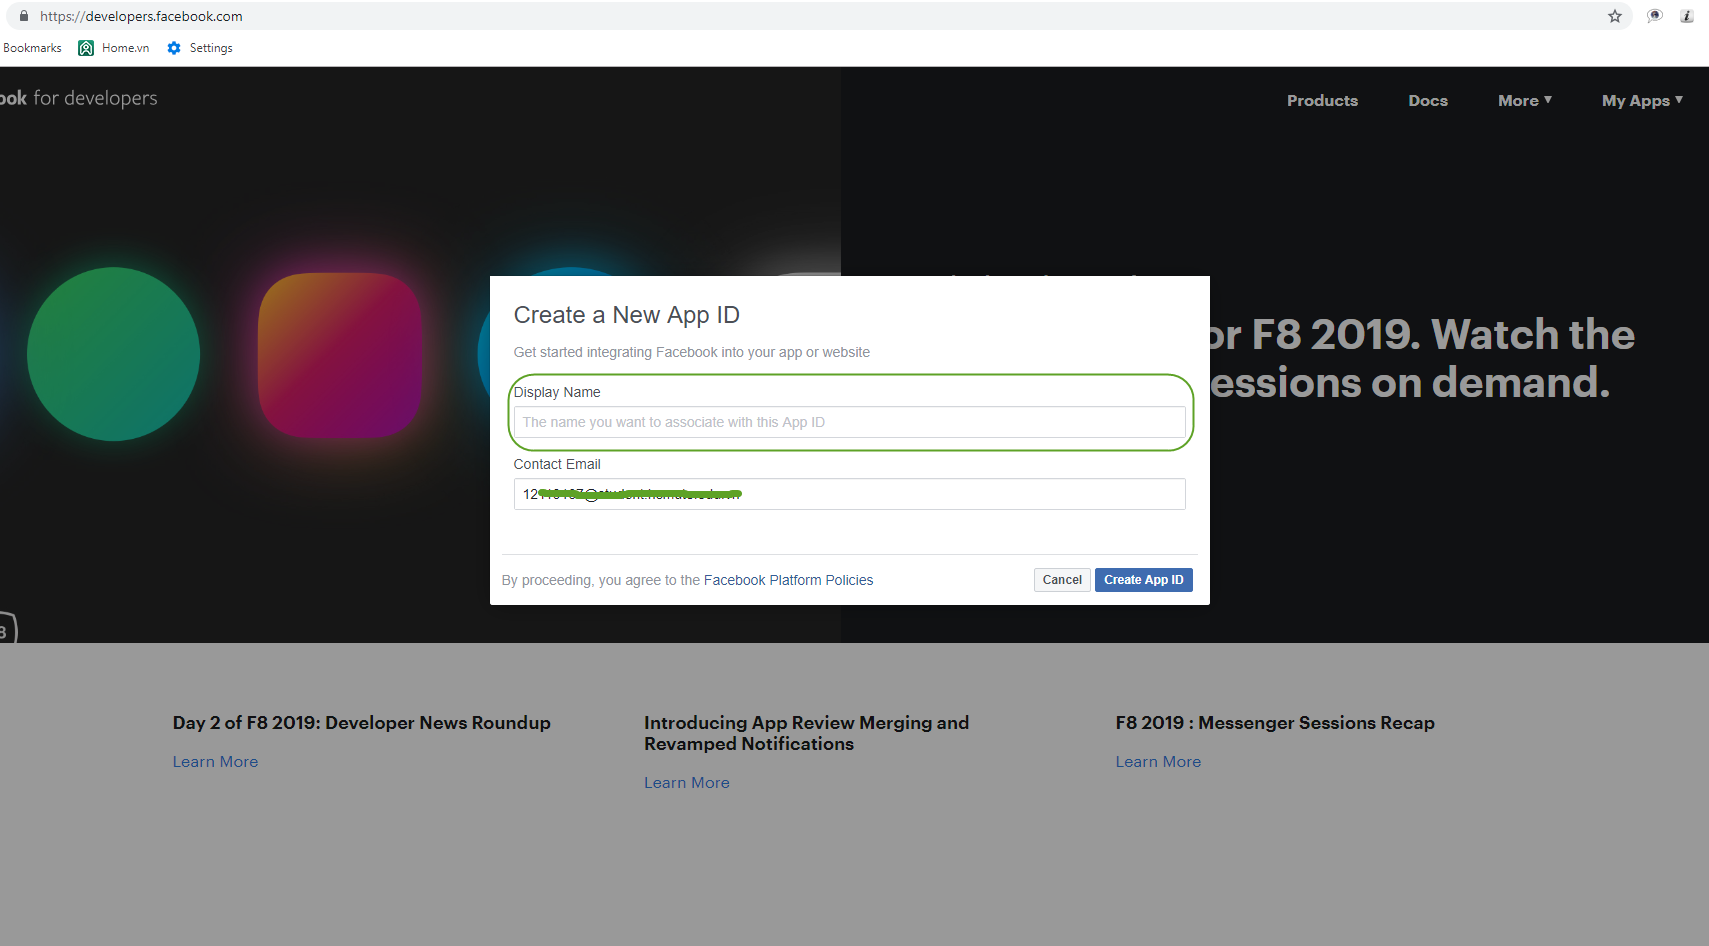
3. Fill in your app's name and contact Email
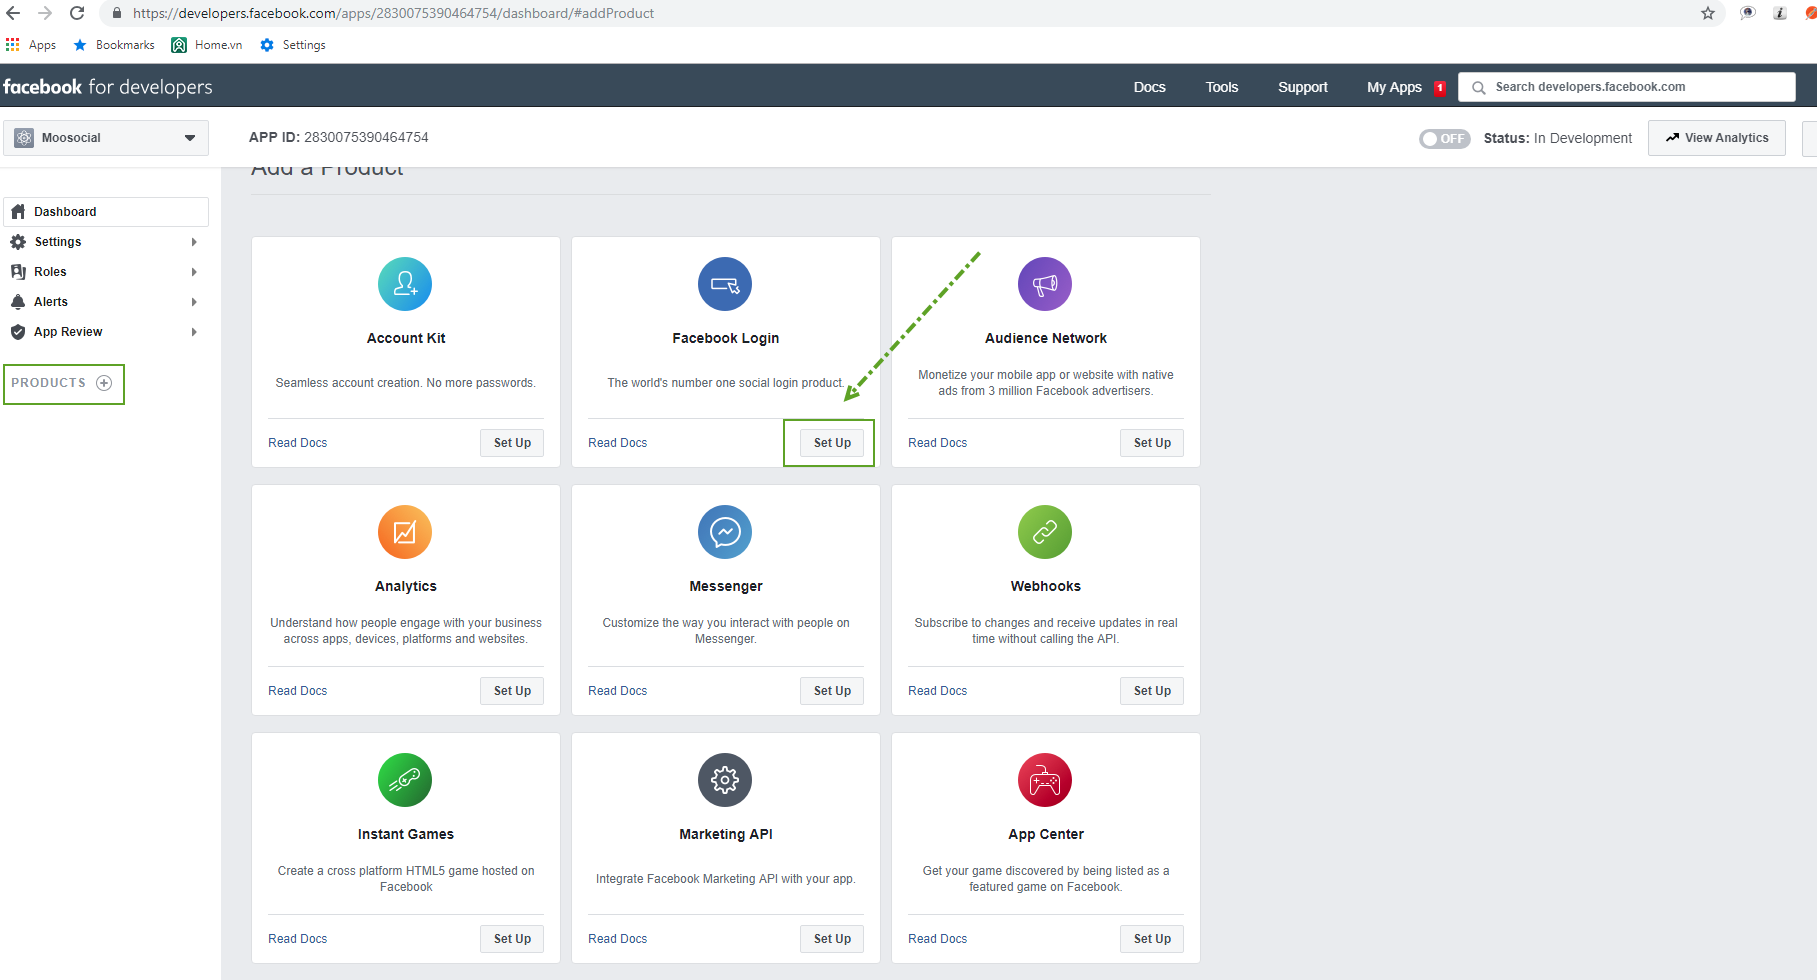
4. Select "Set up" button at Facebook Login from Add Products page
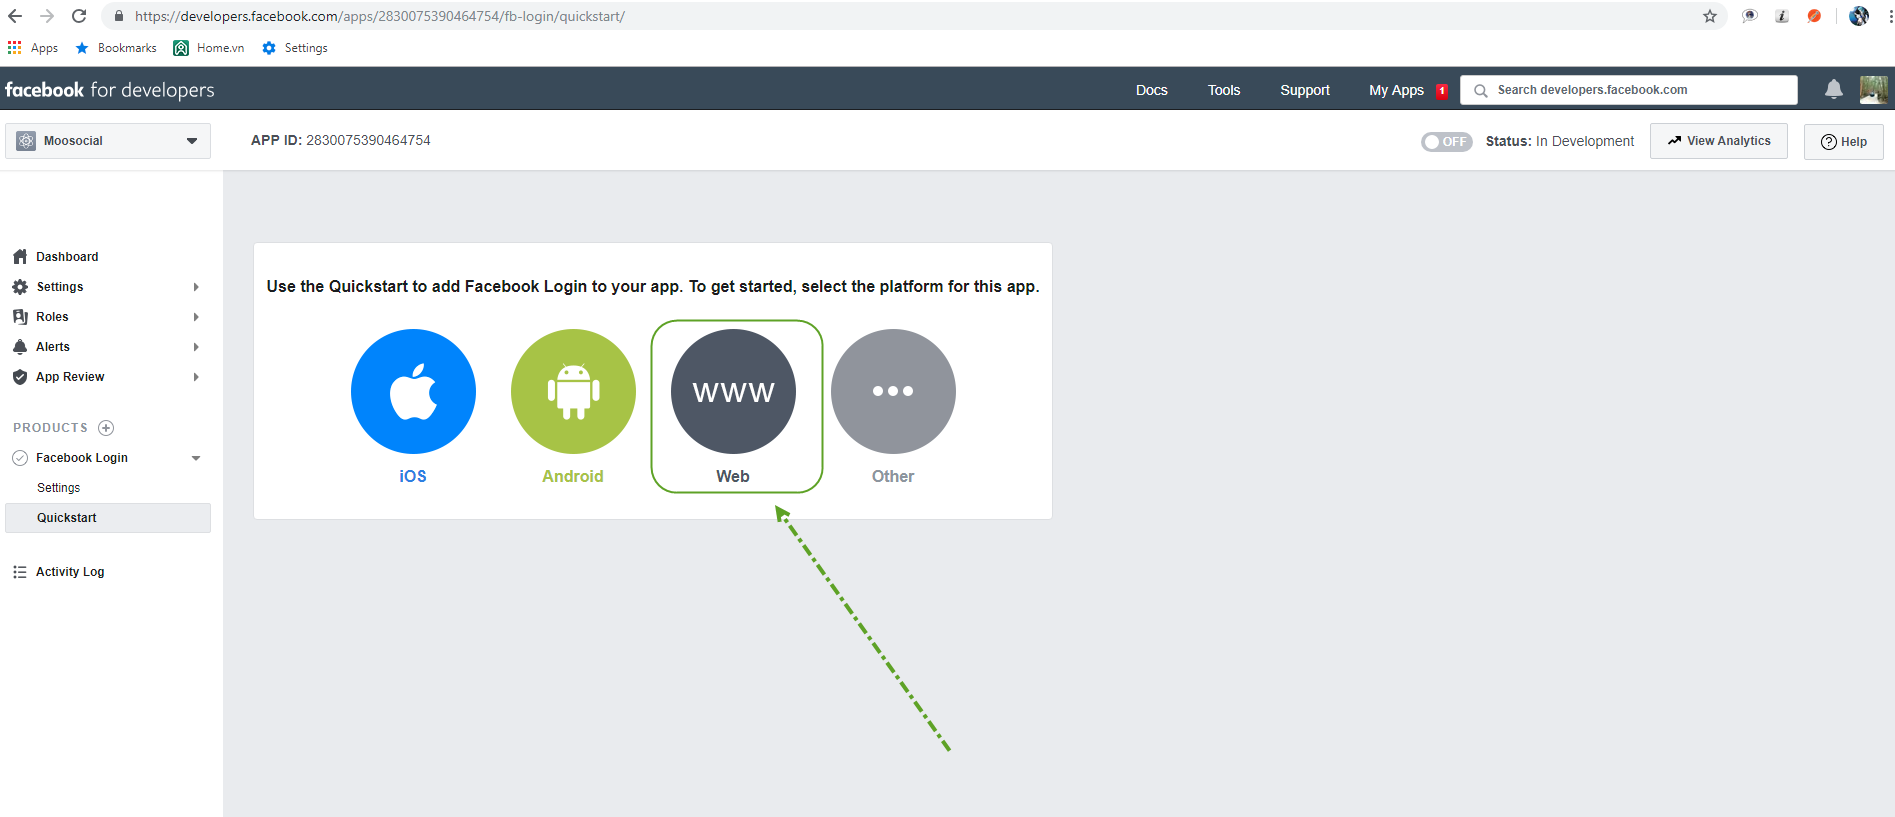
5. Select platform for your app, select Web platform
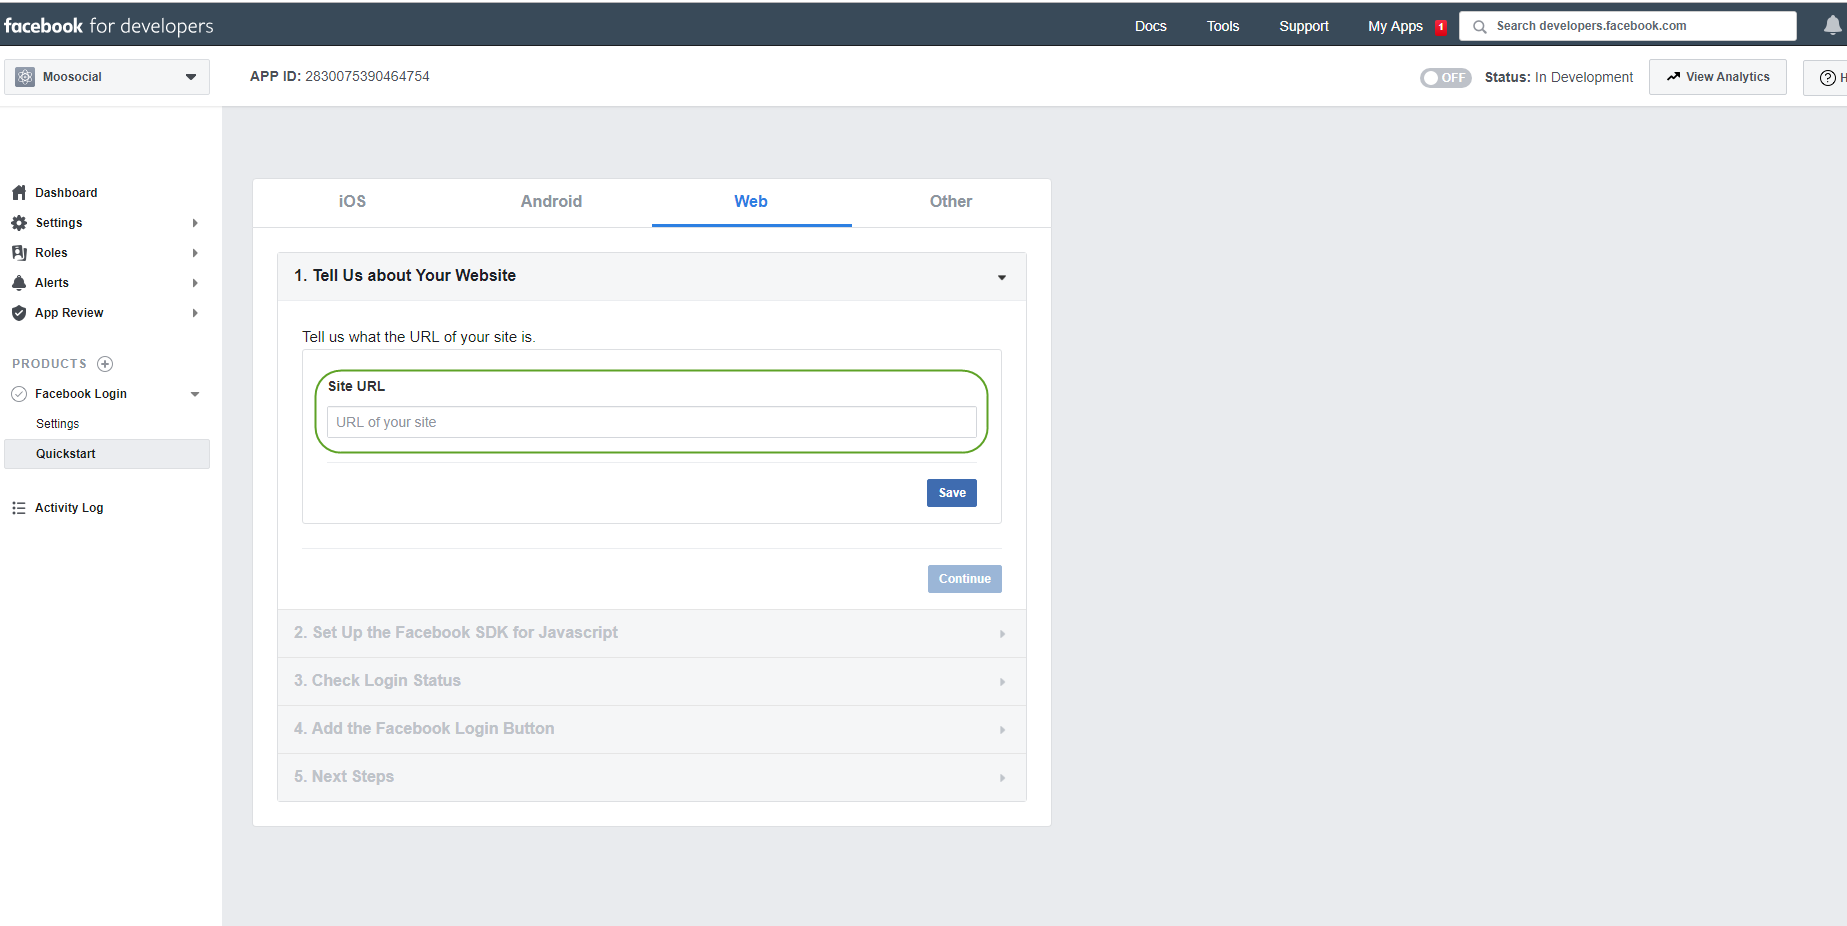
6. After select platform fill in your Site URL and click on Save button
7. After your app was successfully created, make sure it is activated (live)
To make your app live, go to Settings/Basic
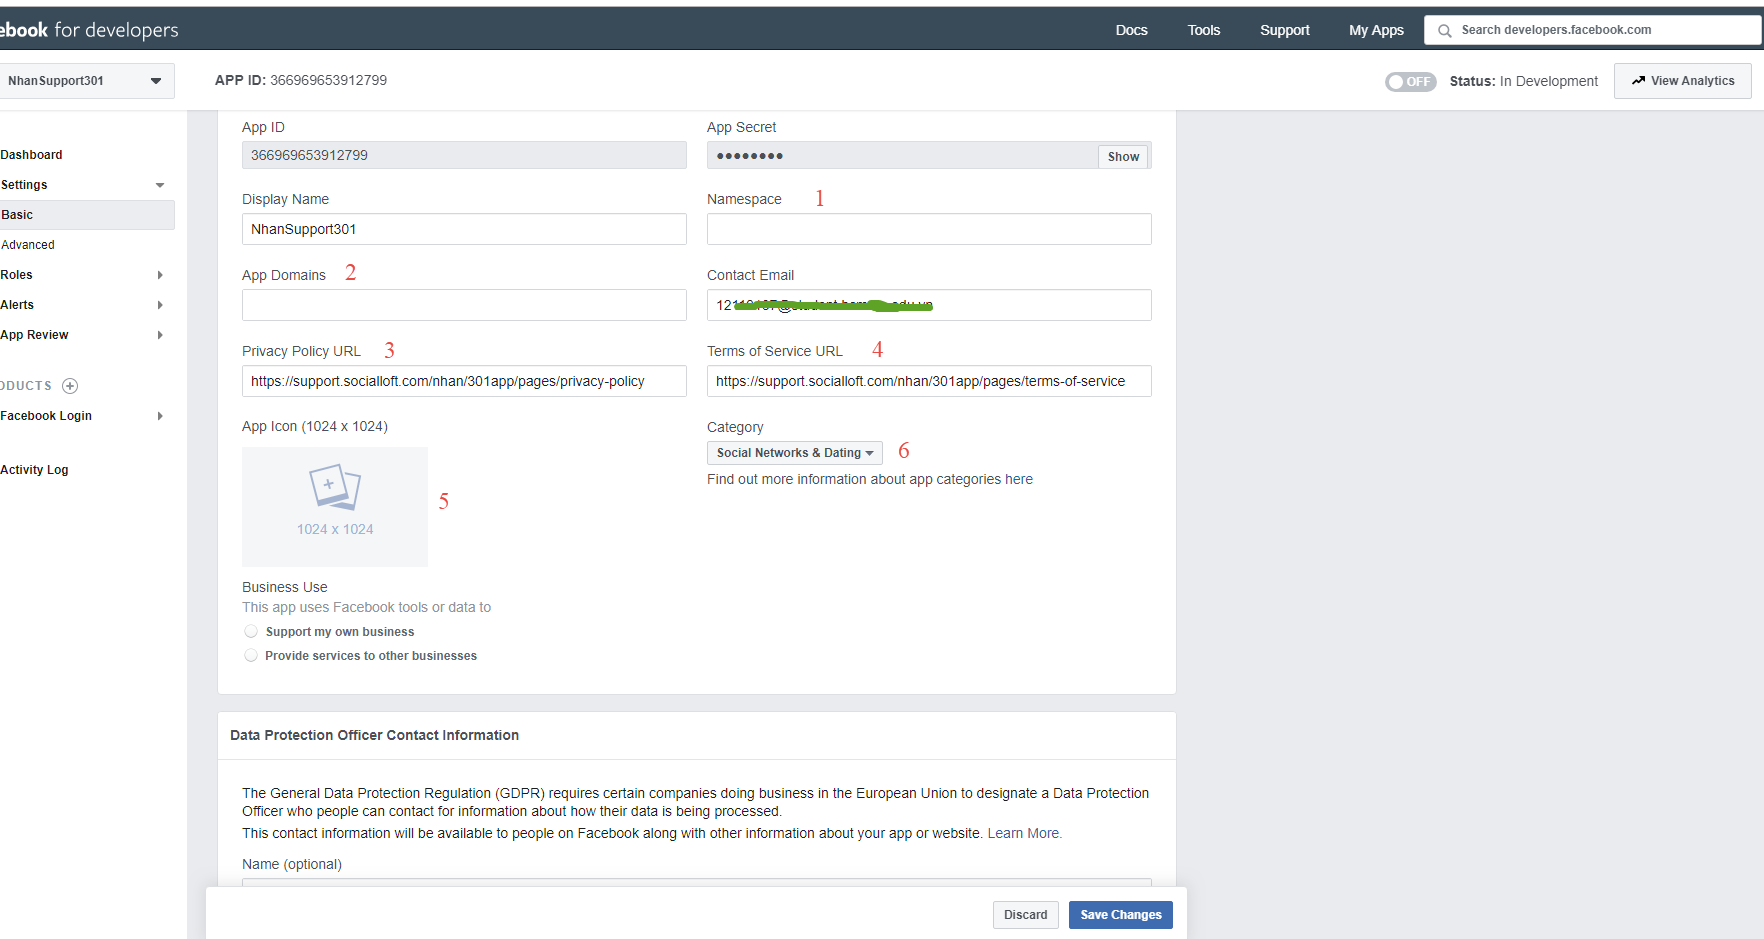
#1: Fill in your Namespace
#2: Fill in your App Domains
#3: Fill in your Site Privacy Policy URL
#4: Fill in your Site Terms of Service URL
#5: Upload your icon
#6: Selelct your app category
Click on Save Changes button
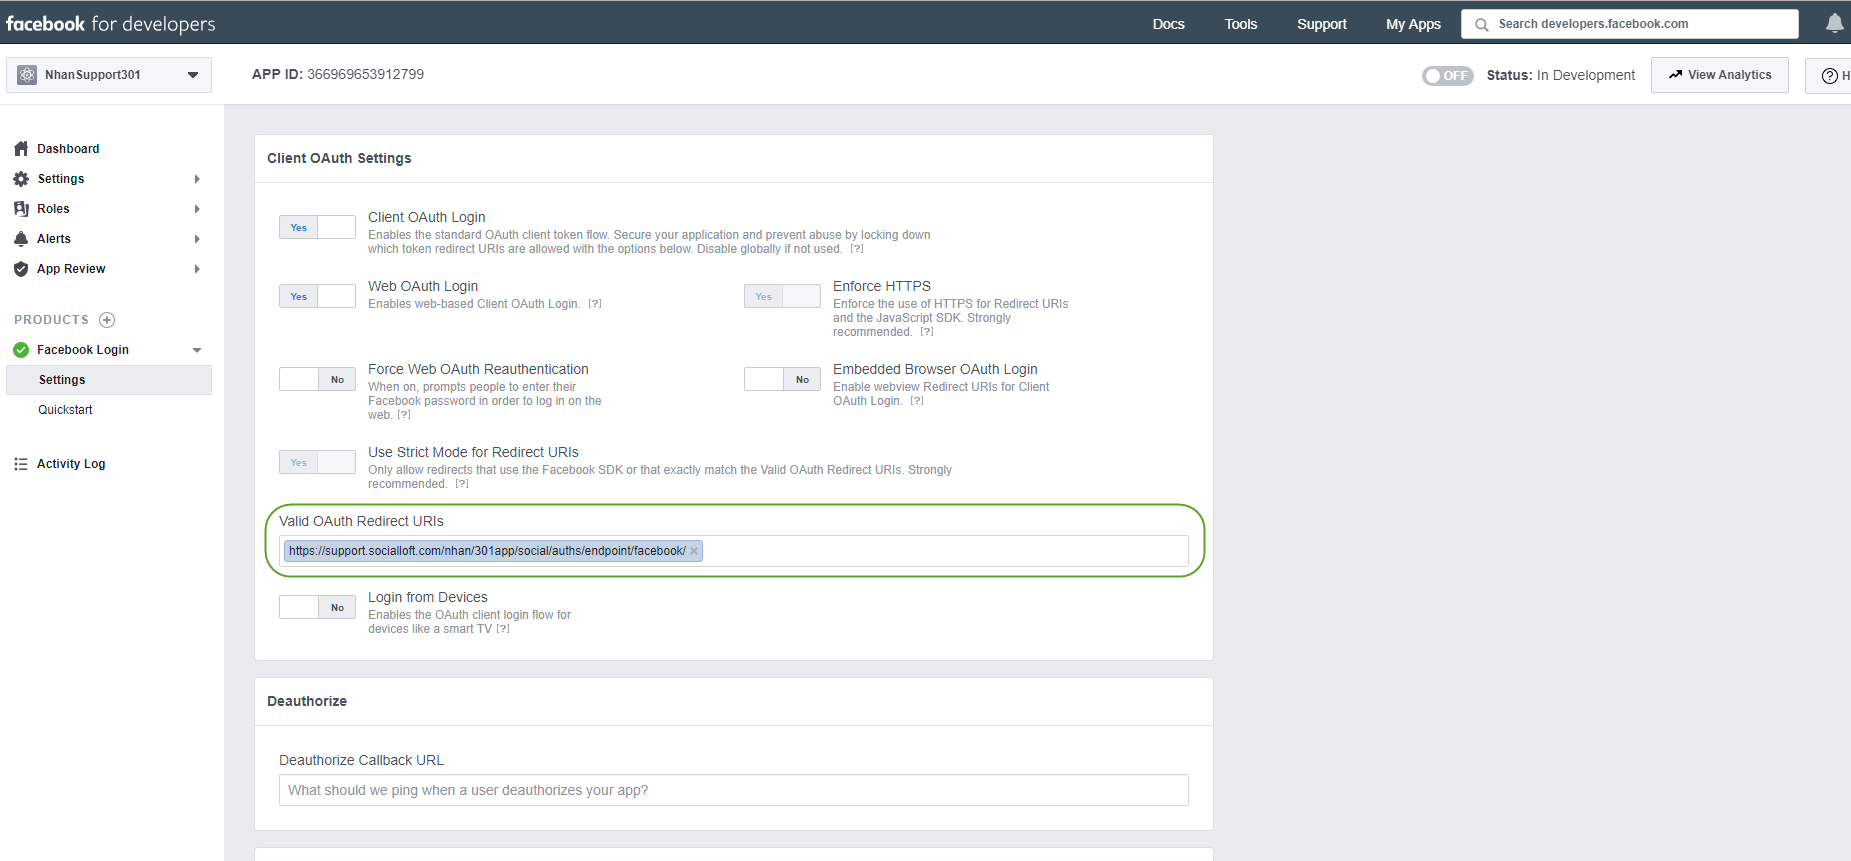
8. Go to Facebook login/Settings and enter your valid OAuth redirect URIs.
It has format: [yoursite/social/auths/endpoint/facebook/]
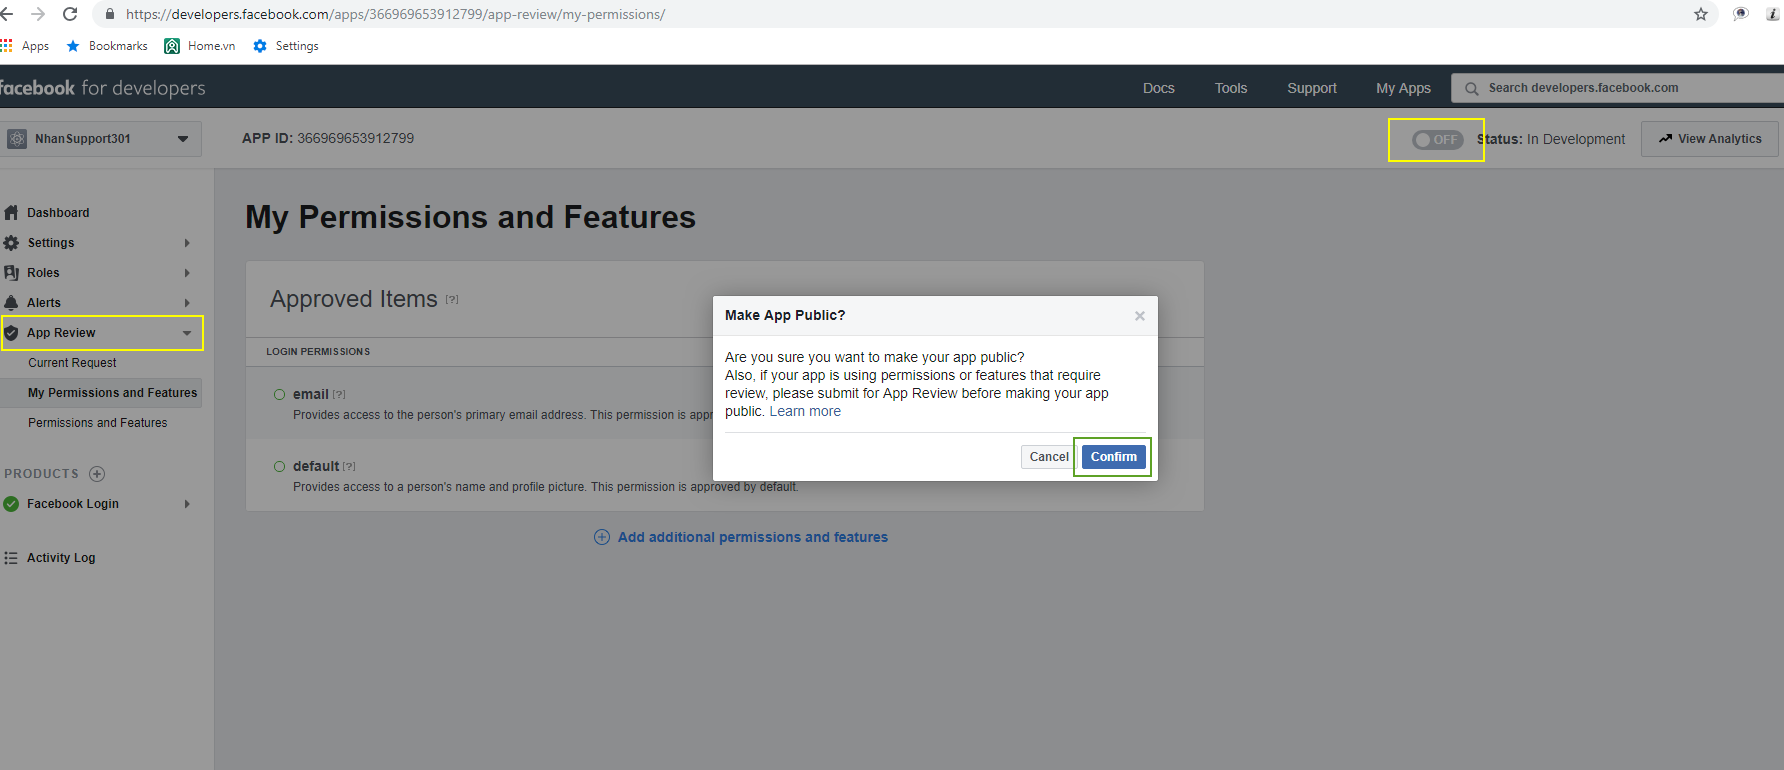
9. Go to App Reivew below Setting tab, switch to On. Click on Confirm button
10. How to configure your Admin Dashboard
1.1. Go to Admin Dashboard/Socials Integration/Facebook
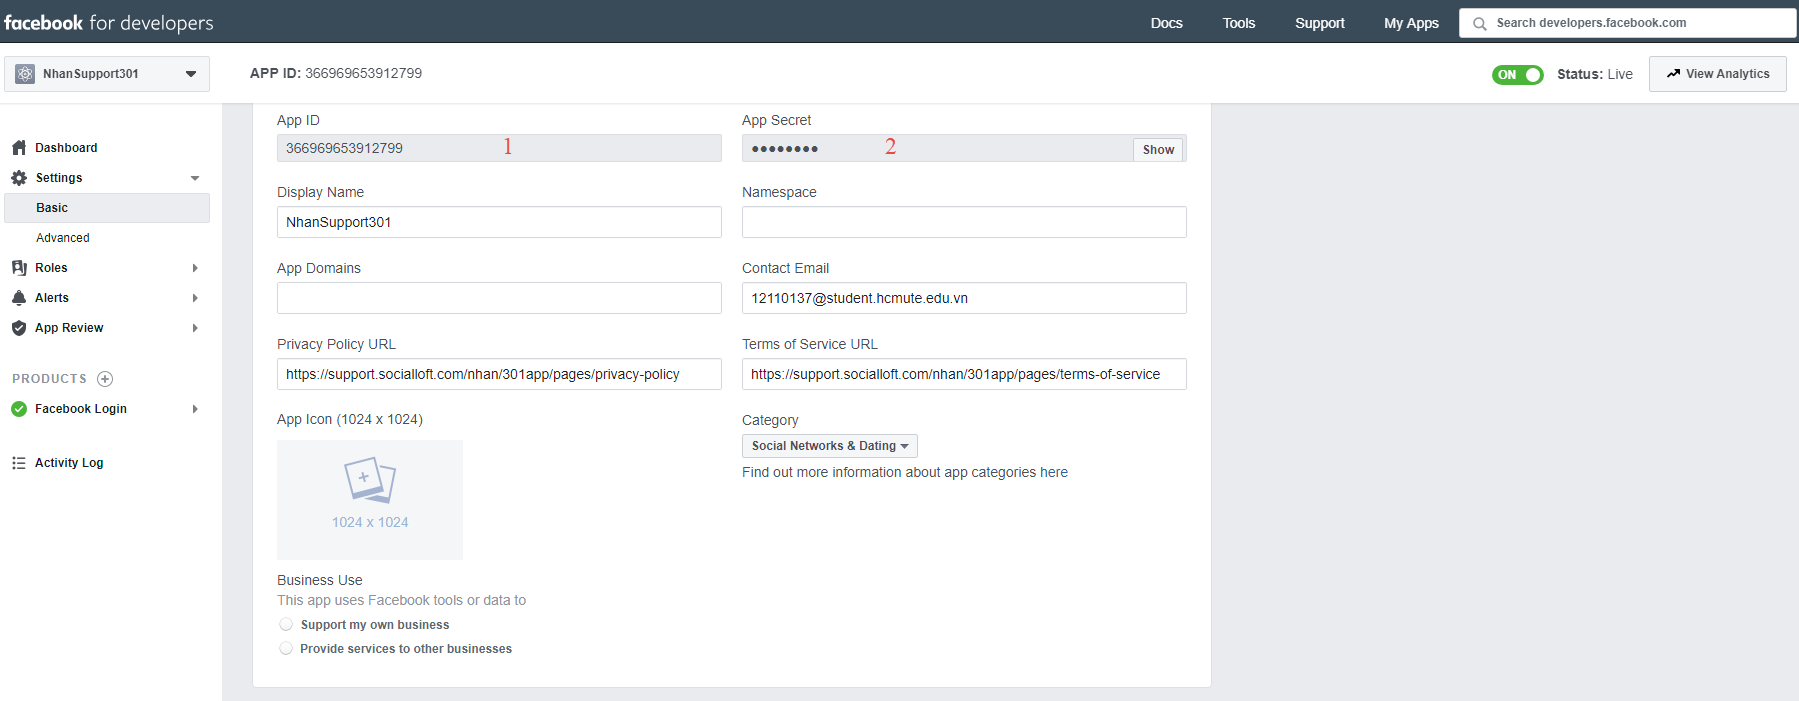
1.2. Get #1 and #2 from facebook app and copy to your Admin Dashboard/Socials Integration/Facebook
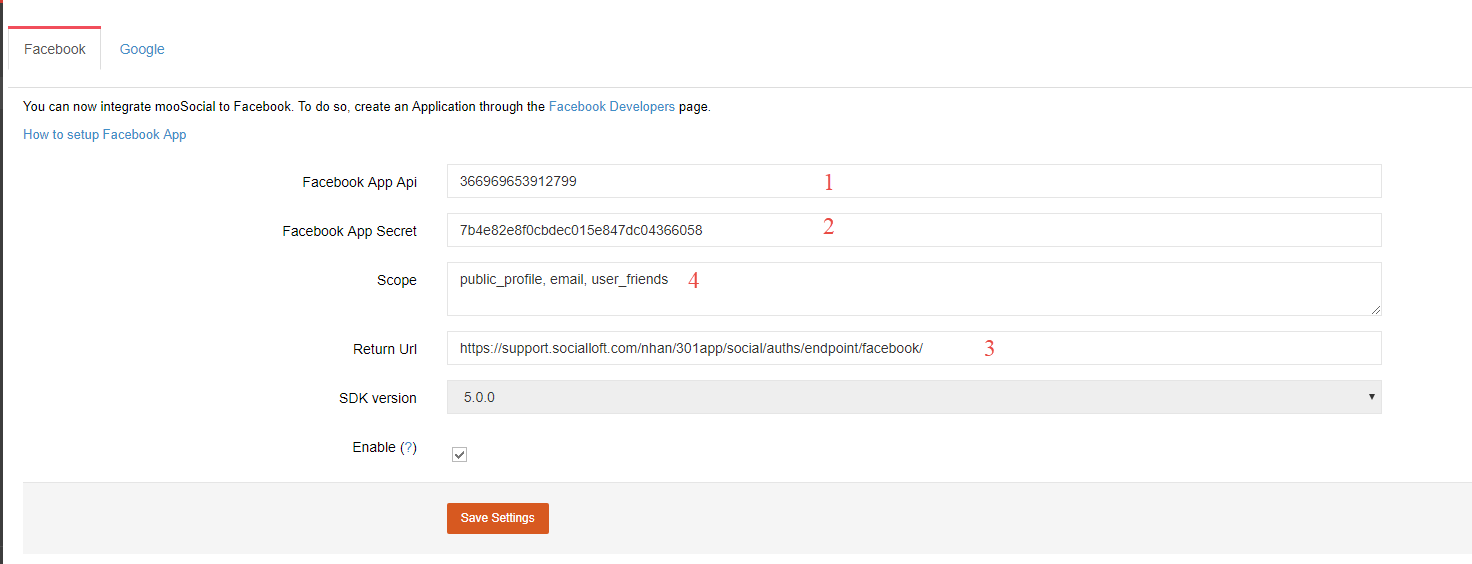
#1: Your App ID from your FB app (in your FB app/Settings/Basic)
#2: Your App Secret from your FB app (in your FB app/Settings/Basic, the App Secret will show after pressing Show button and re-enter your FB password.)
#3: Your Return Url that configured which has the format: [yoursite/social/auths/endpoint/facebook/]
#4: At Scope, remove "user_friends"
Click on Save Settings button
*Remember to check if any space in the fields.
*Remember your site could be [https] instead of [http], they will not recognize if site was [https] and Client ID & Admin Dashboard were [http].
----------------------------------------------------------------------------------------------------------------------------------------------
1. Go to console.developer.google.com
2. Login your google account & create project
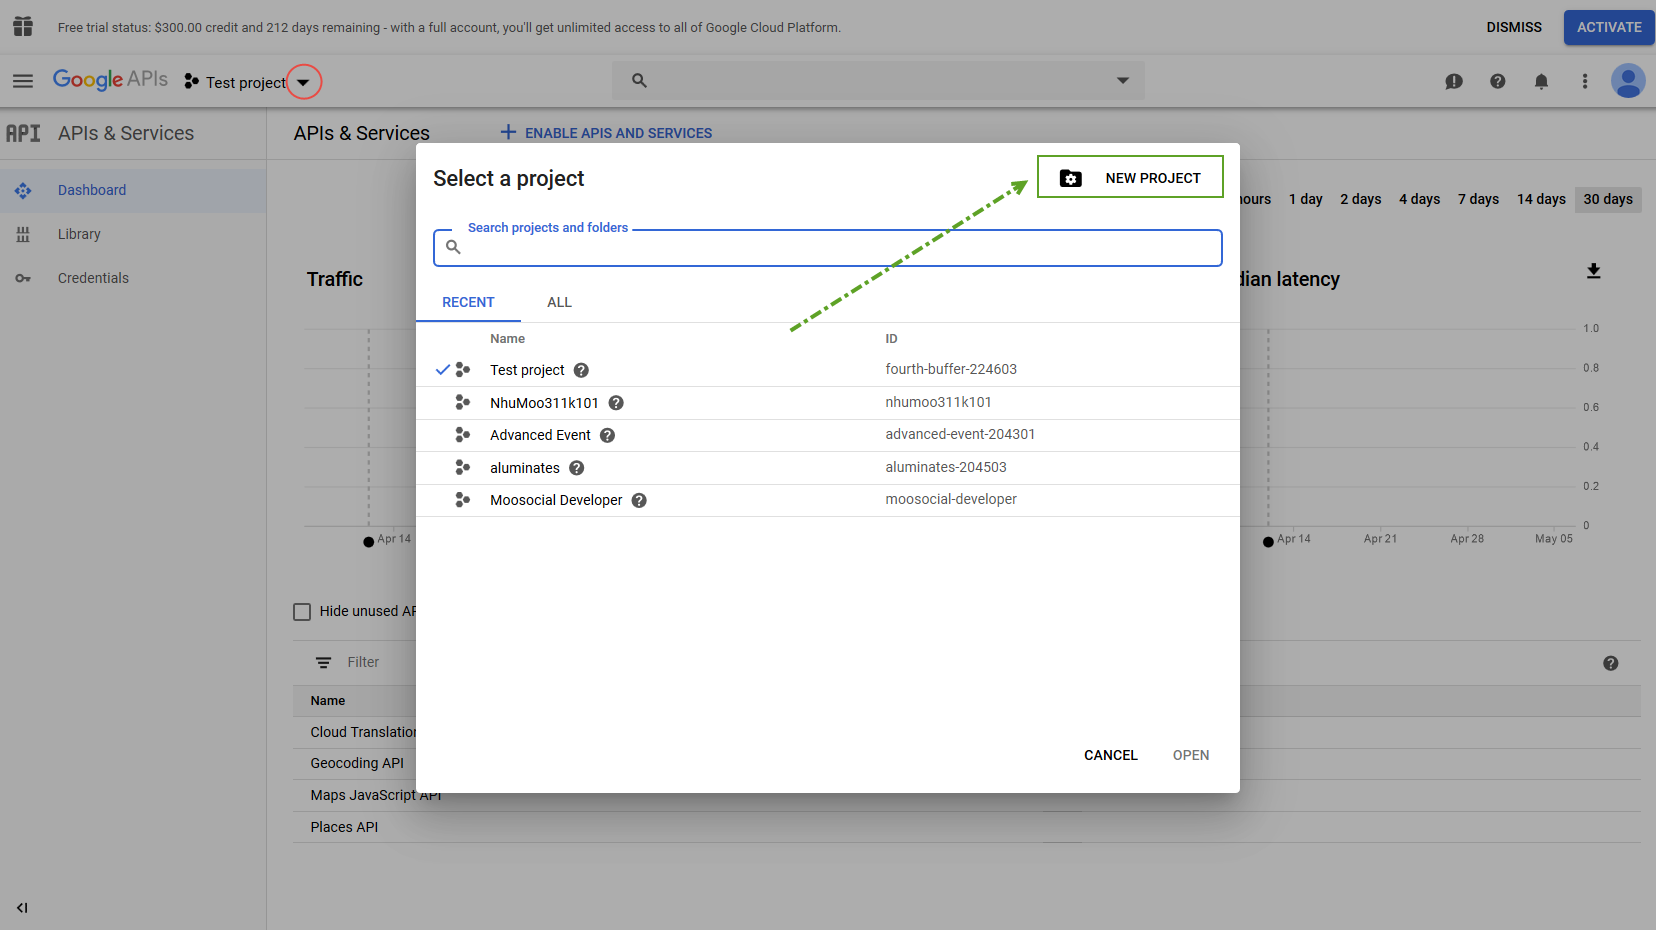
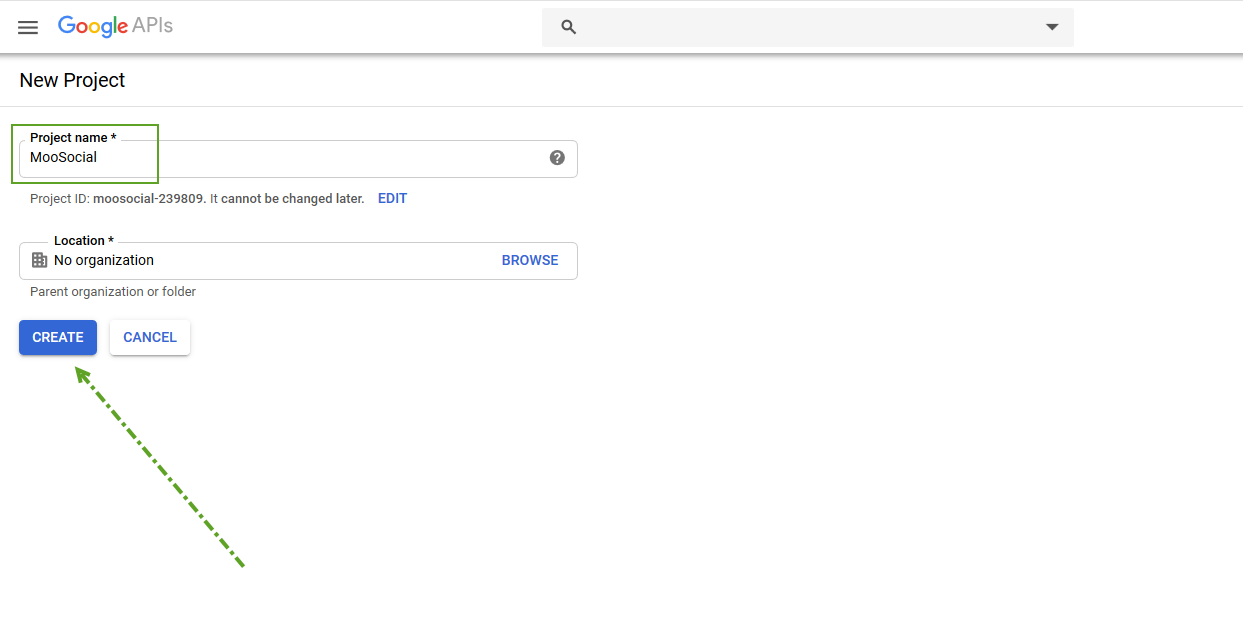
3. Fill in your Project's name and click on Create button
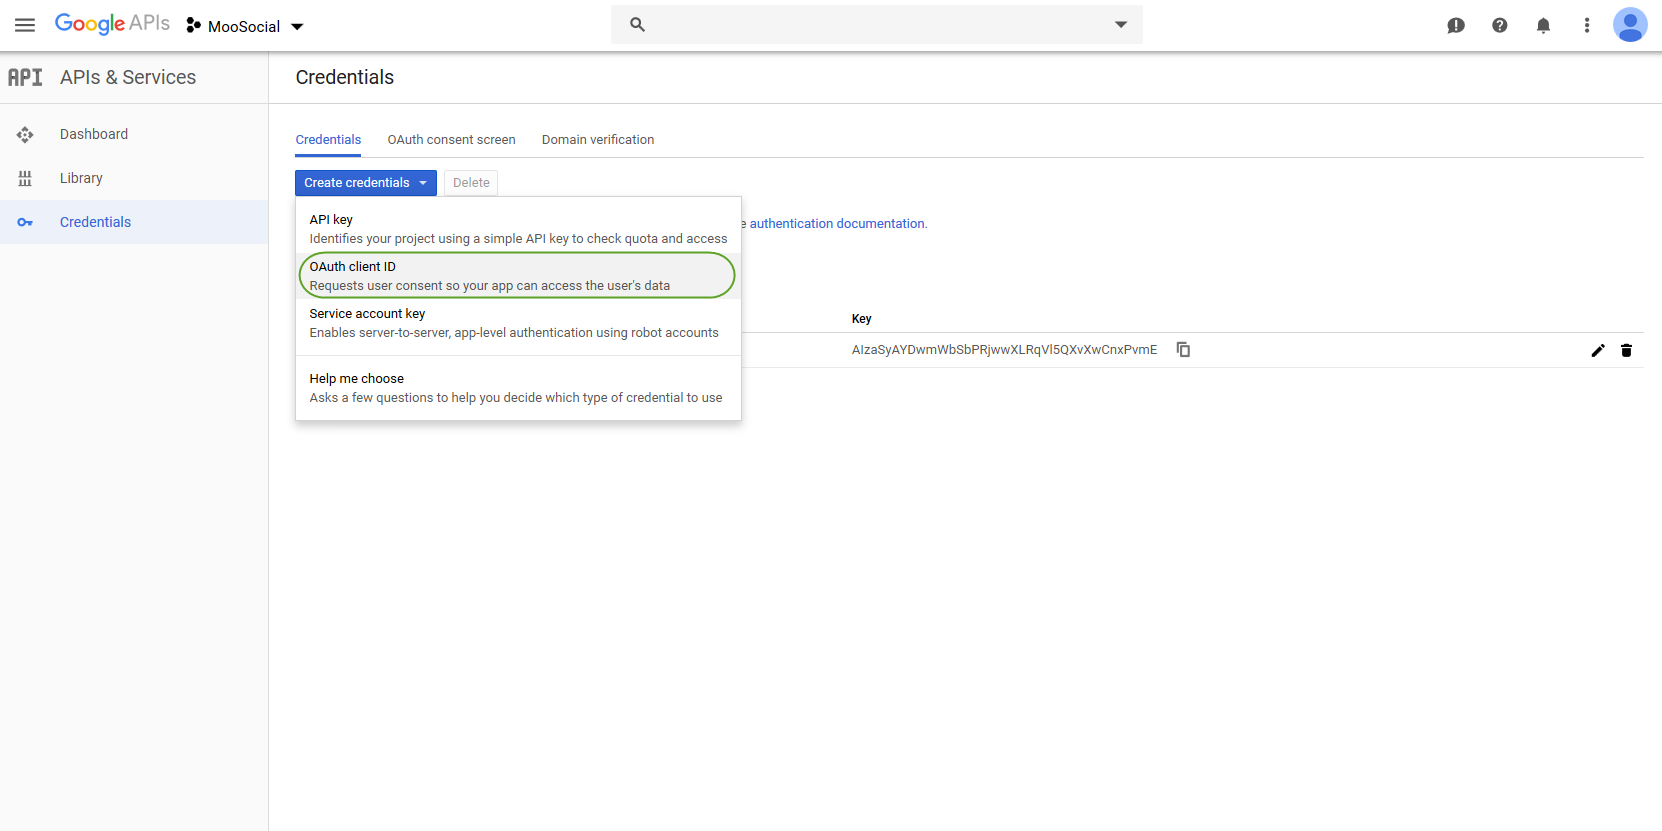
4. Go to Credentials tab, create a credentials by selecting Create credential and choose "OAuth Client ID" option
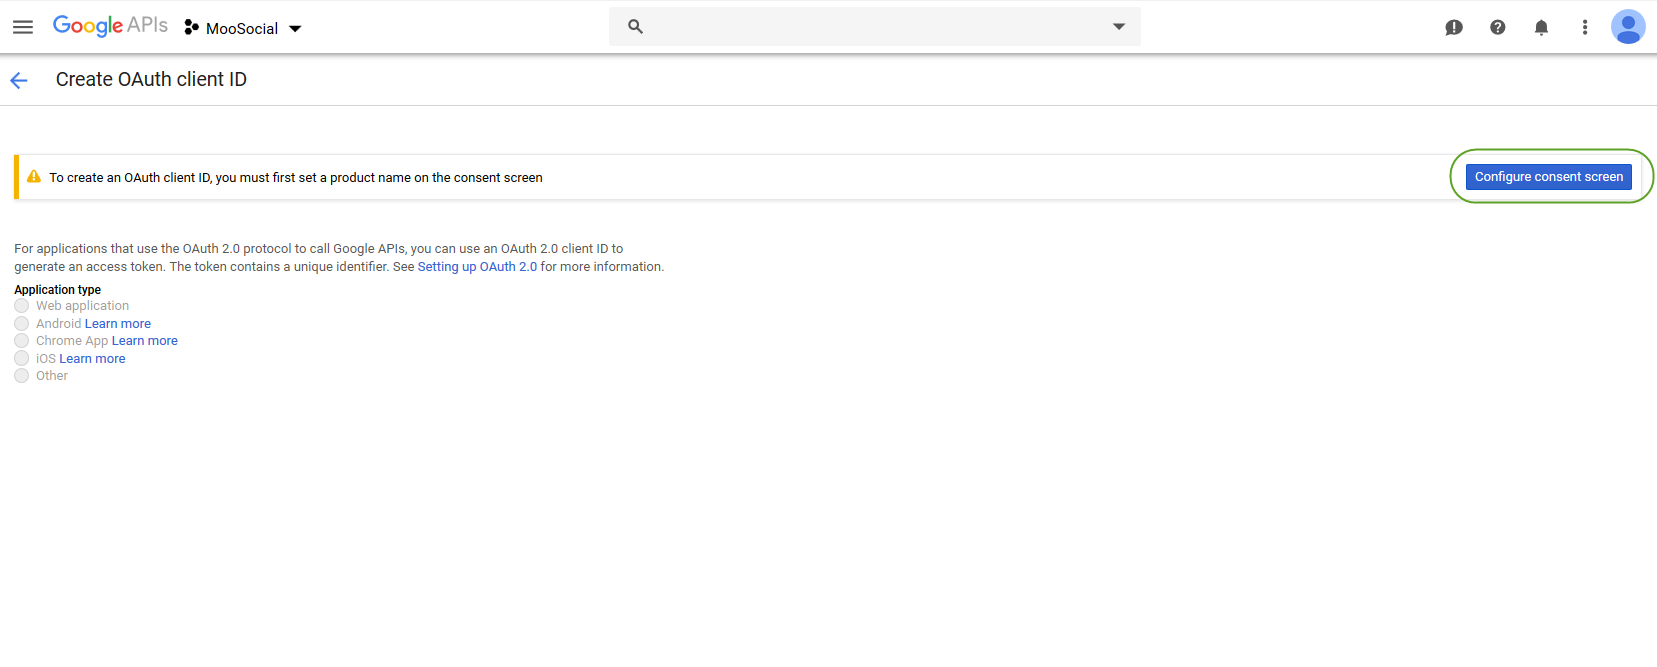
5. We have to configure consent screen first then Press on Configure consent screen button
6. Register at consent screen
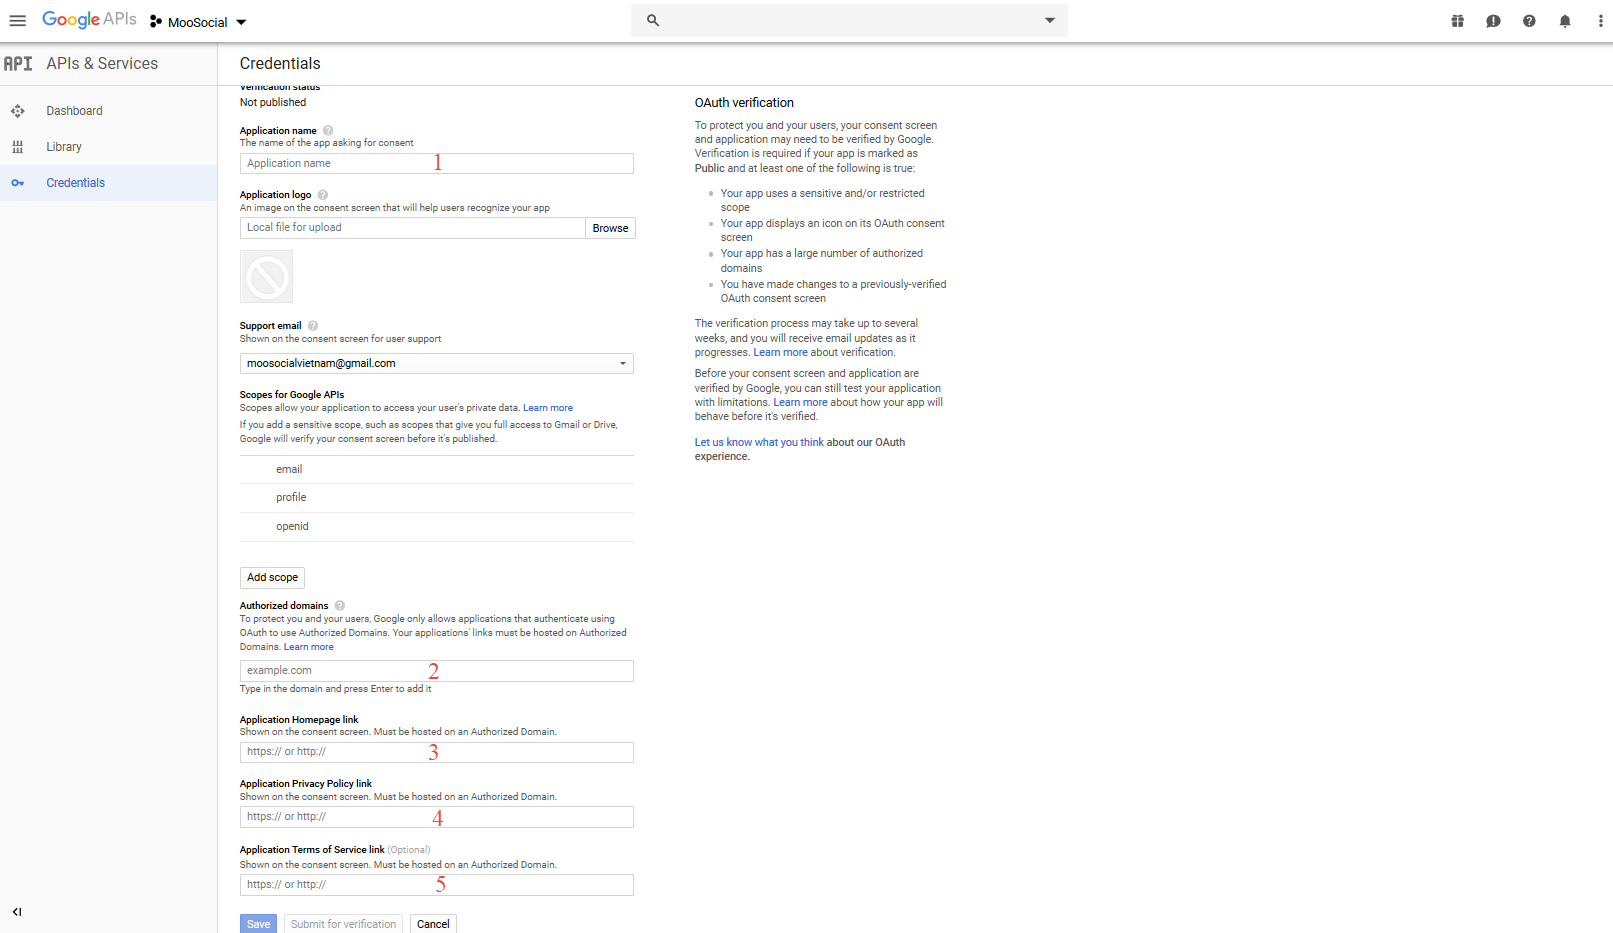
#1: Fill in your Application name
#2: Fill in your Authorized domains
#3: Fill in your Application Homepage link
#4: Fill in your Privacy Policy link
#5: Fill in your Terms of Service link
Press on Save button
7. Once you had registered your consent screen. Start creating Client ID
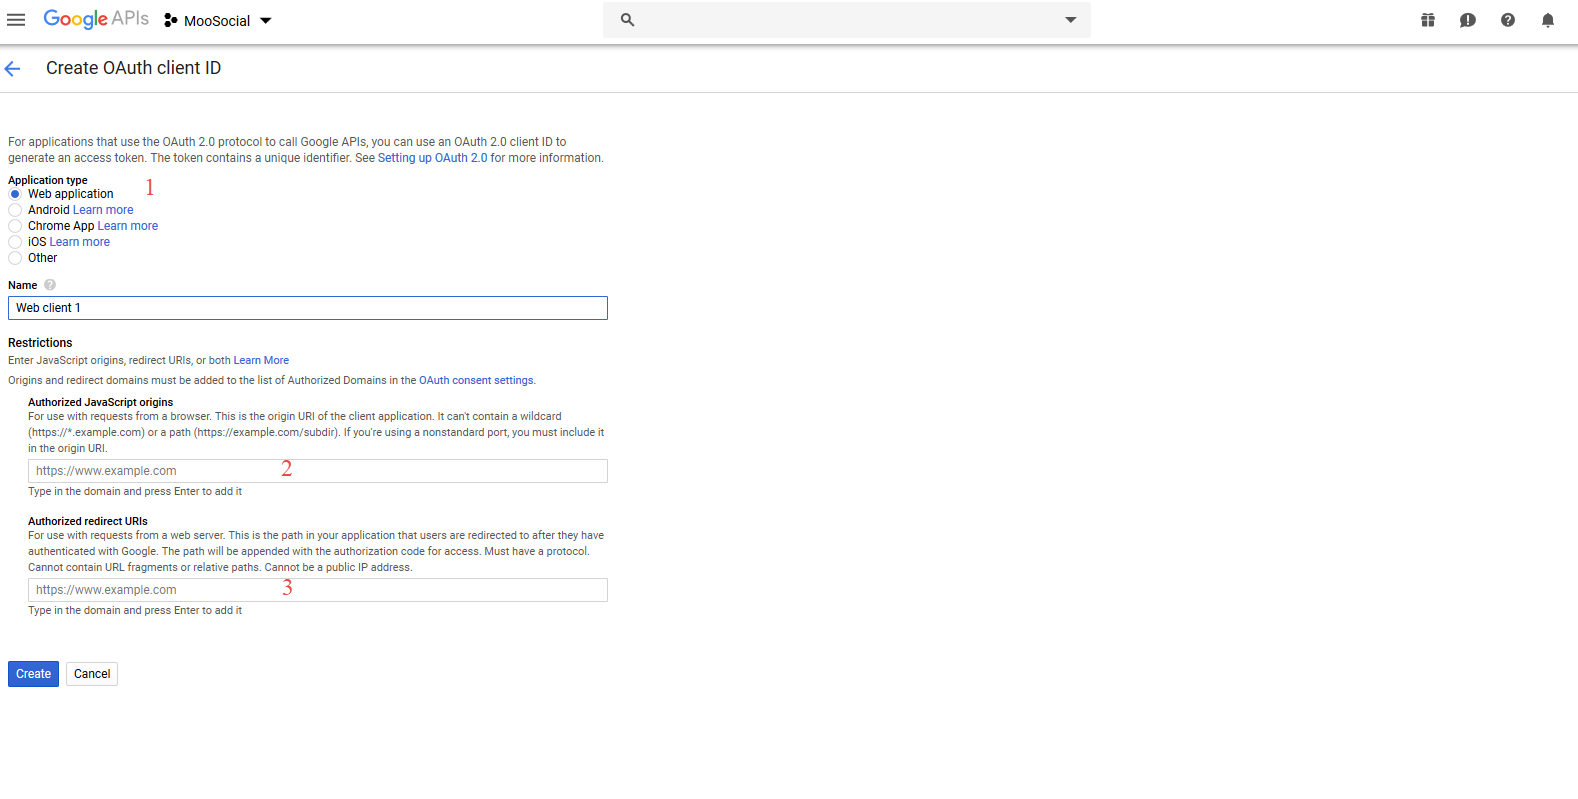
#1: Select Web Application
#2: Fill in your site's domain
#3: Fill in your callback's URL, this URL has the format: [yoursite/social/auths/endpoint/google?hauth.done=Google]
8. How to configure your Admin Dashboard
1.1. Go to Admin Dashboard/Socials Integration/Google
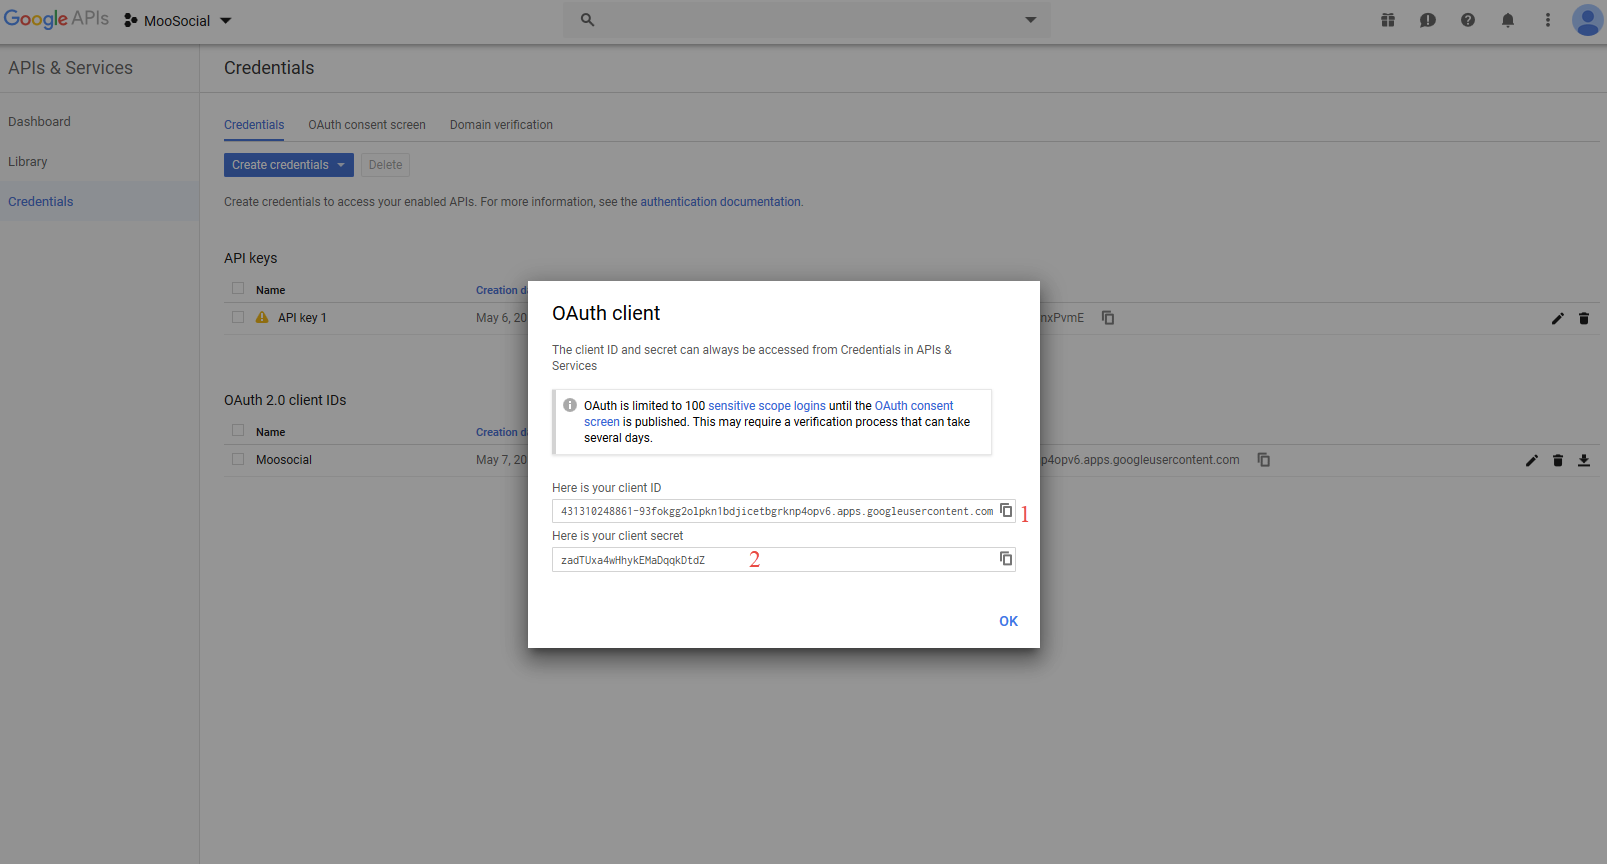
1.2. Get #1 and #2 from google app and copy to your Admin Dashboard/Socials Integration/Google
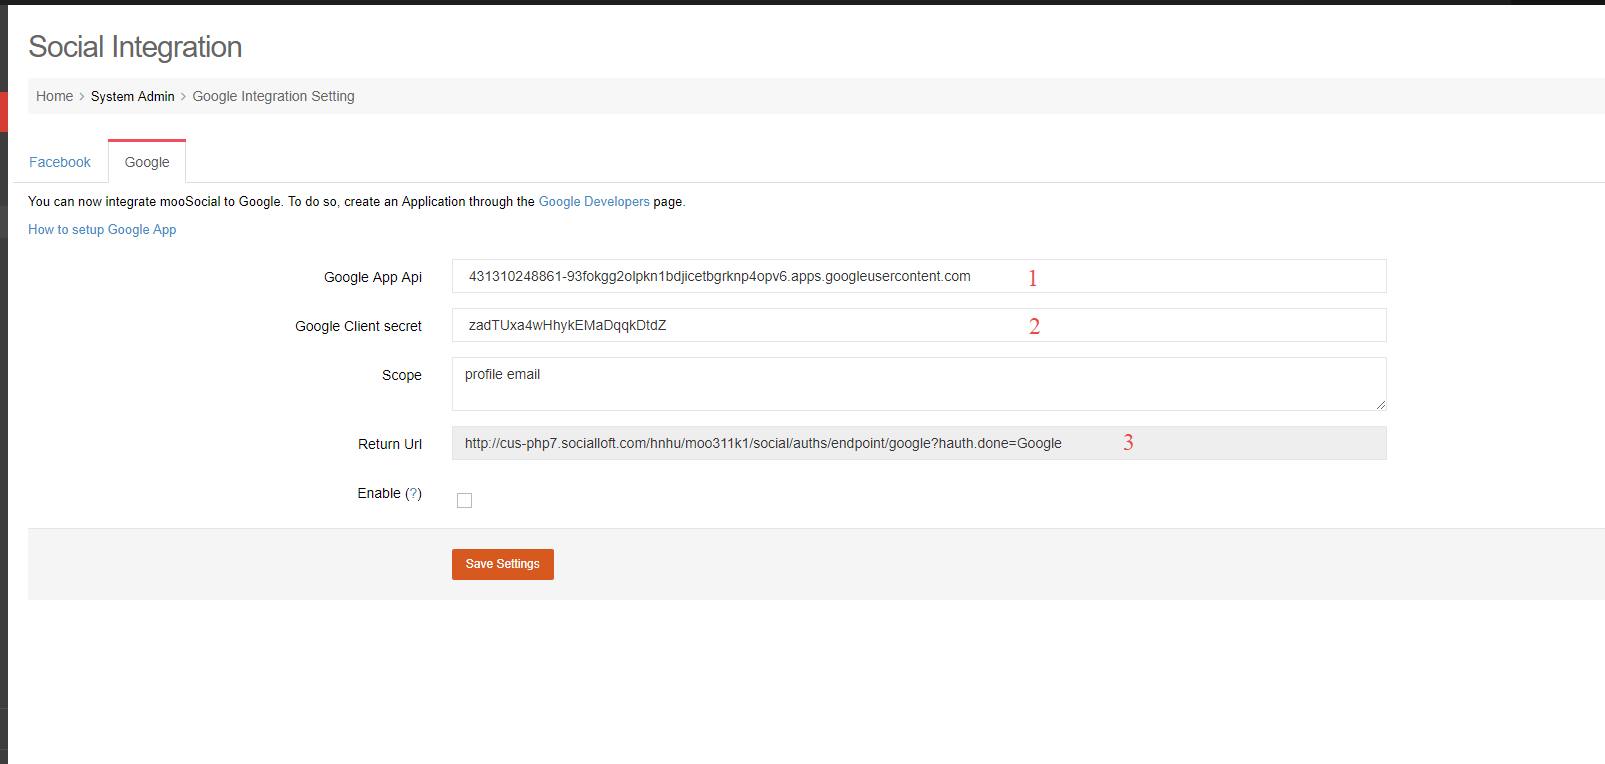
#1: Your Client ID from your Google app
#2: Your Client secret from your Google app
#3: Your Return Url that configured which has the format: [yoursite/social/auths/endpoint/google?hauth.done=Google]
Click on Save Settings button
-------------------------------------------------------------------------------------------------------------------------------------------------
1. Go to https://www.linkedin.com/developers/
2. Login --> Create app

3. Complete information about your app
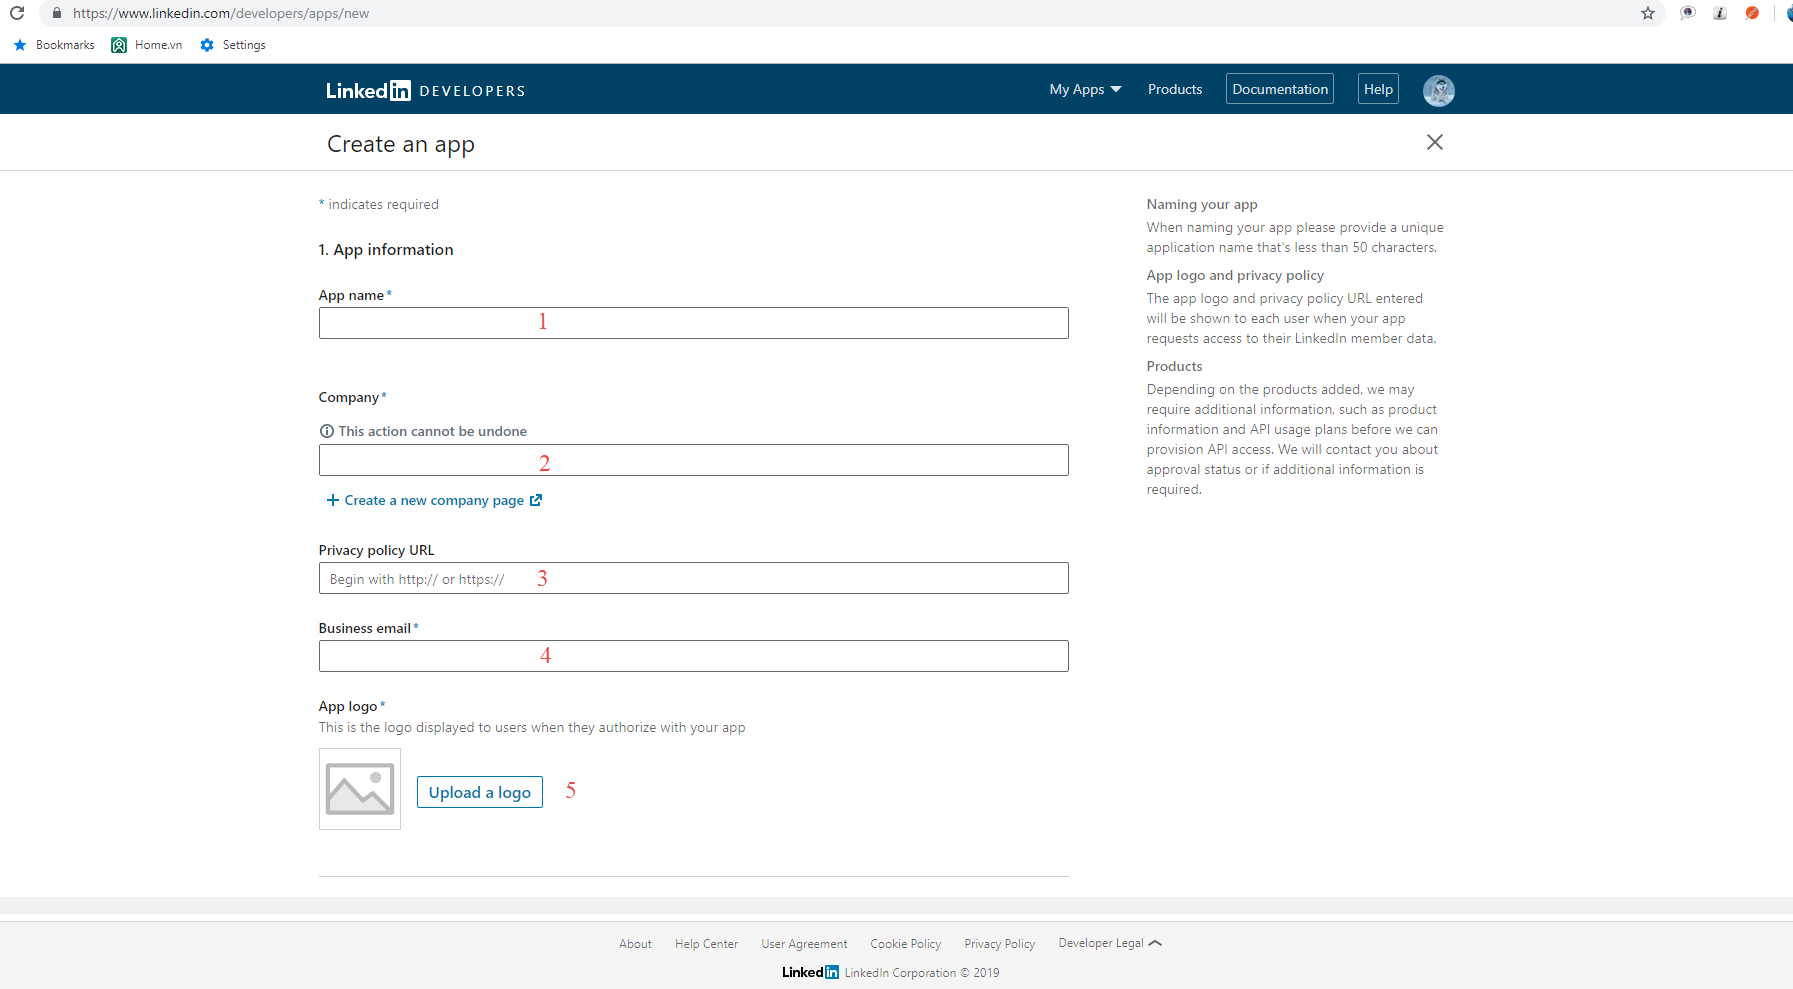
#1: Fill in your App name
#2: Fill in your Company
#3: Fill in your Privacy Policy link
#4: Fill in your business email
#5: Upload your App logo
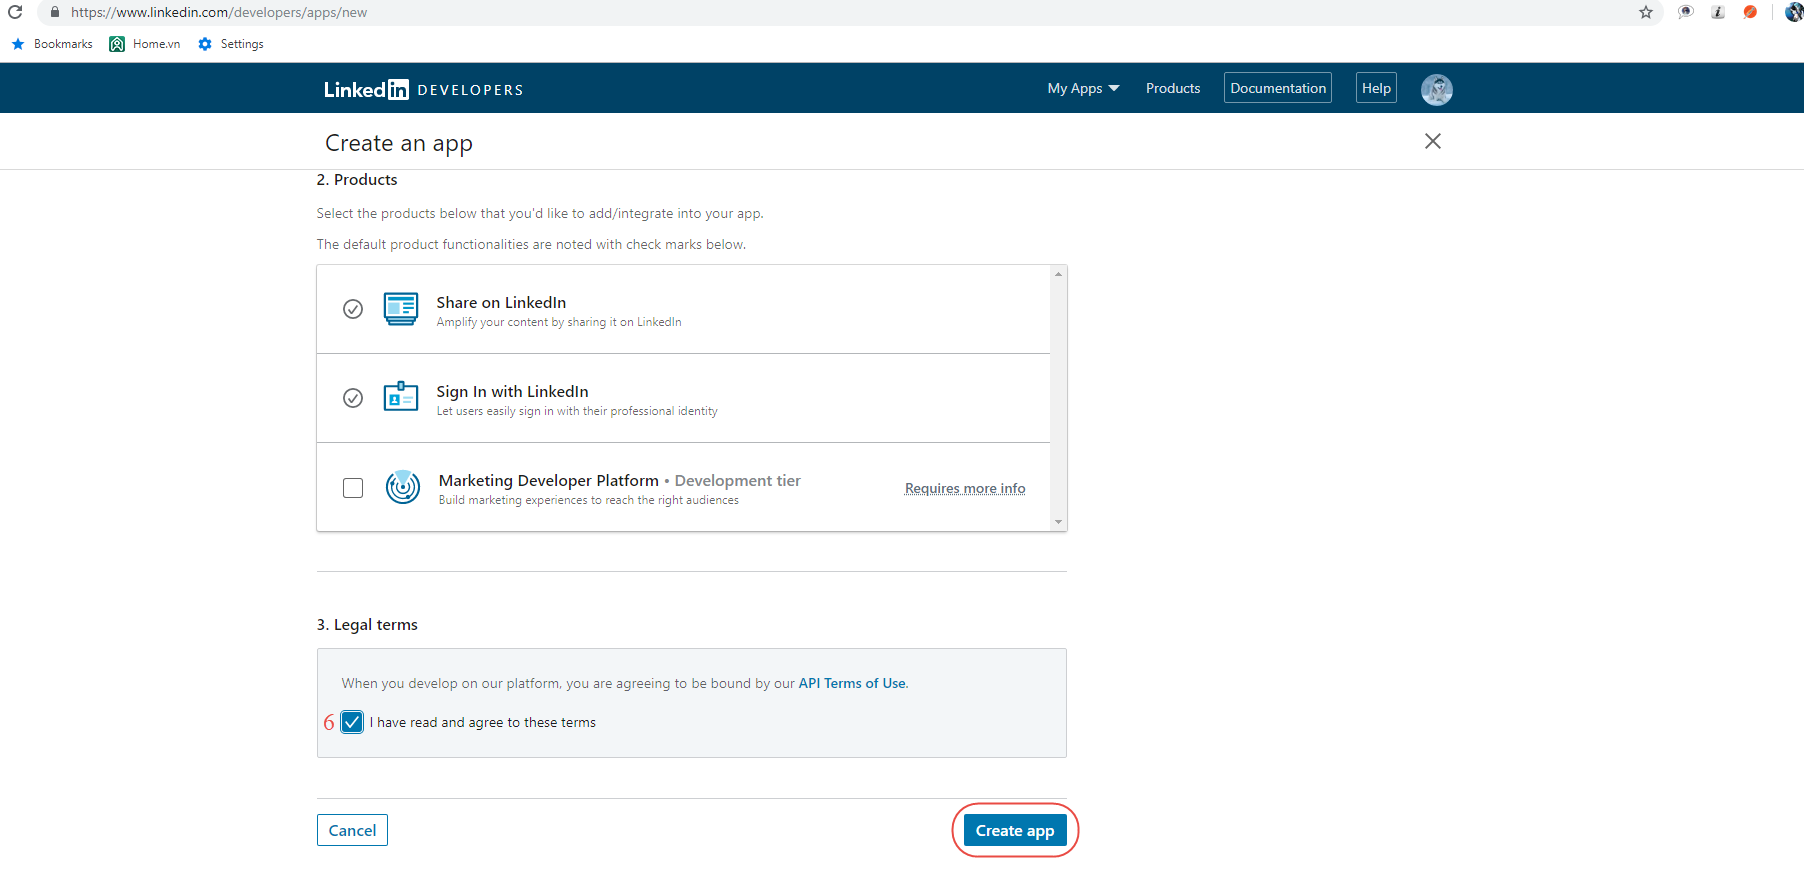
#6: "I have read and agree to these terms" --> checked
Click on Create app button
4. Enter redirect URL
Go to Auth tab
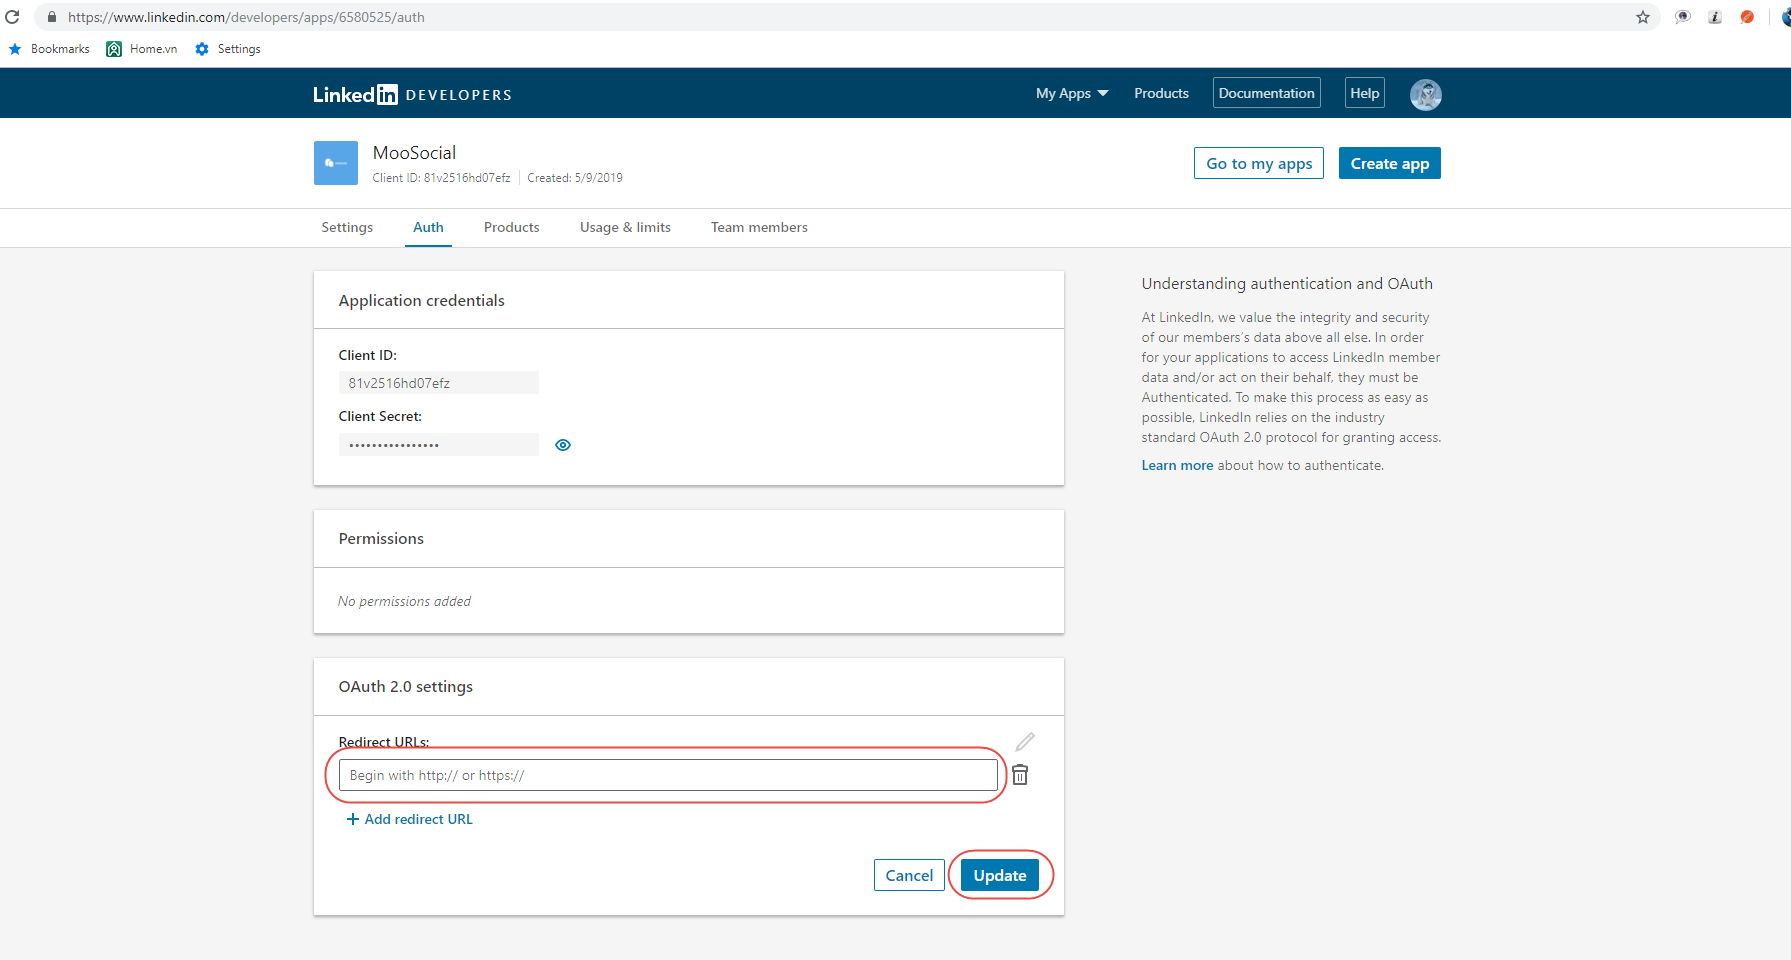
Enter URL in the following format: [yoursite/sociallogin/endpoint/linkedin?hauth.done=Linkedin]
5. How to configure your Admin Dashboard
Go to Admin Dashboard/Social Login/Linkedin
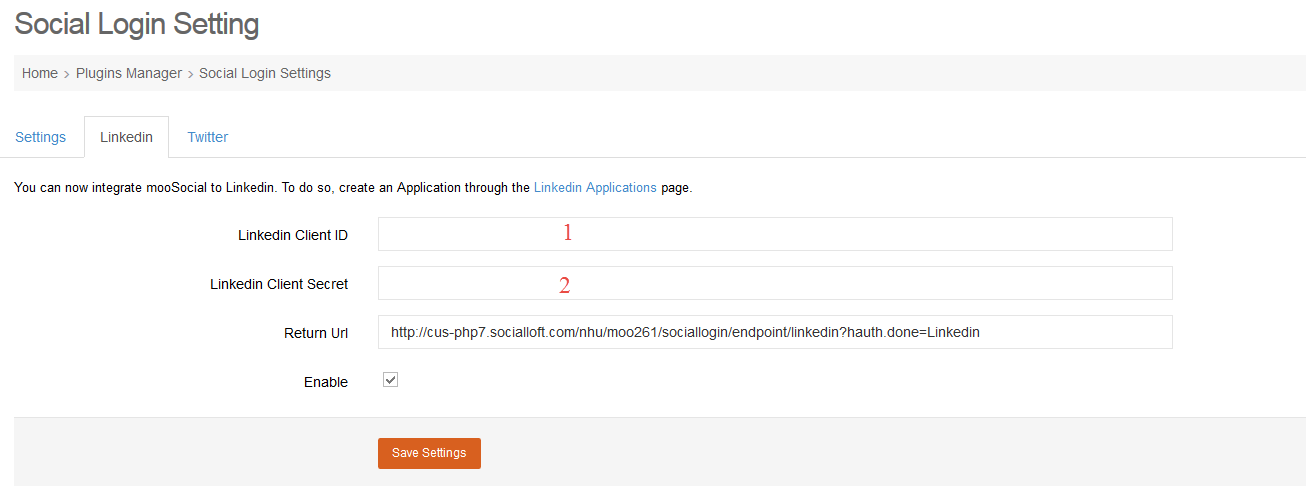
6. Get #1 and #2 from Linked app and copy to your Admin Dashboard/Social Login/Linkedin
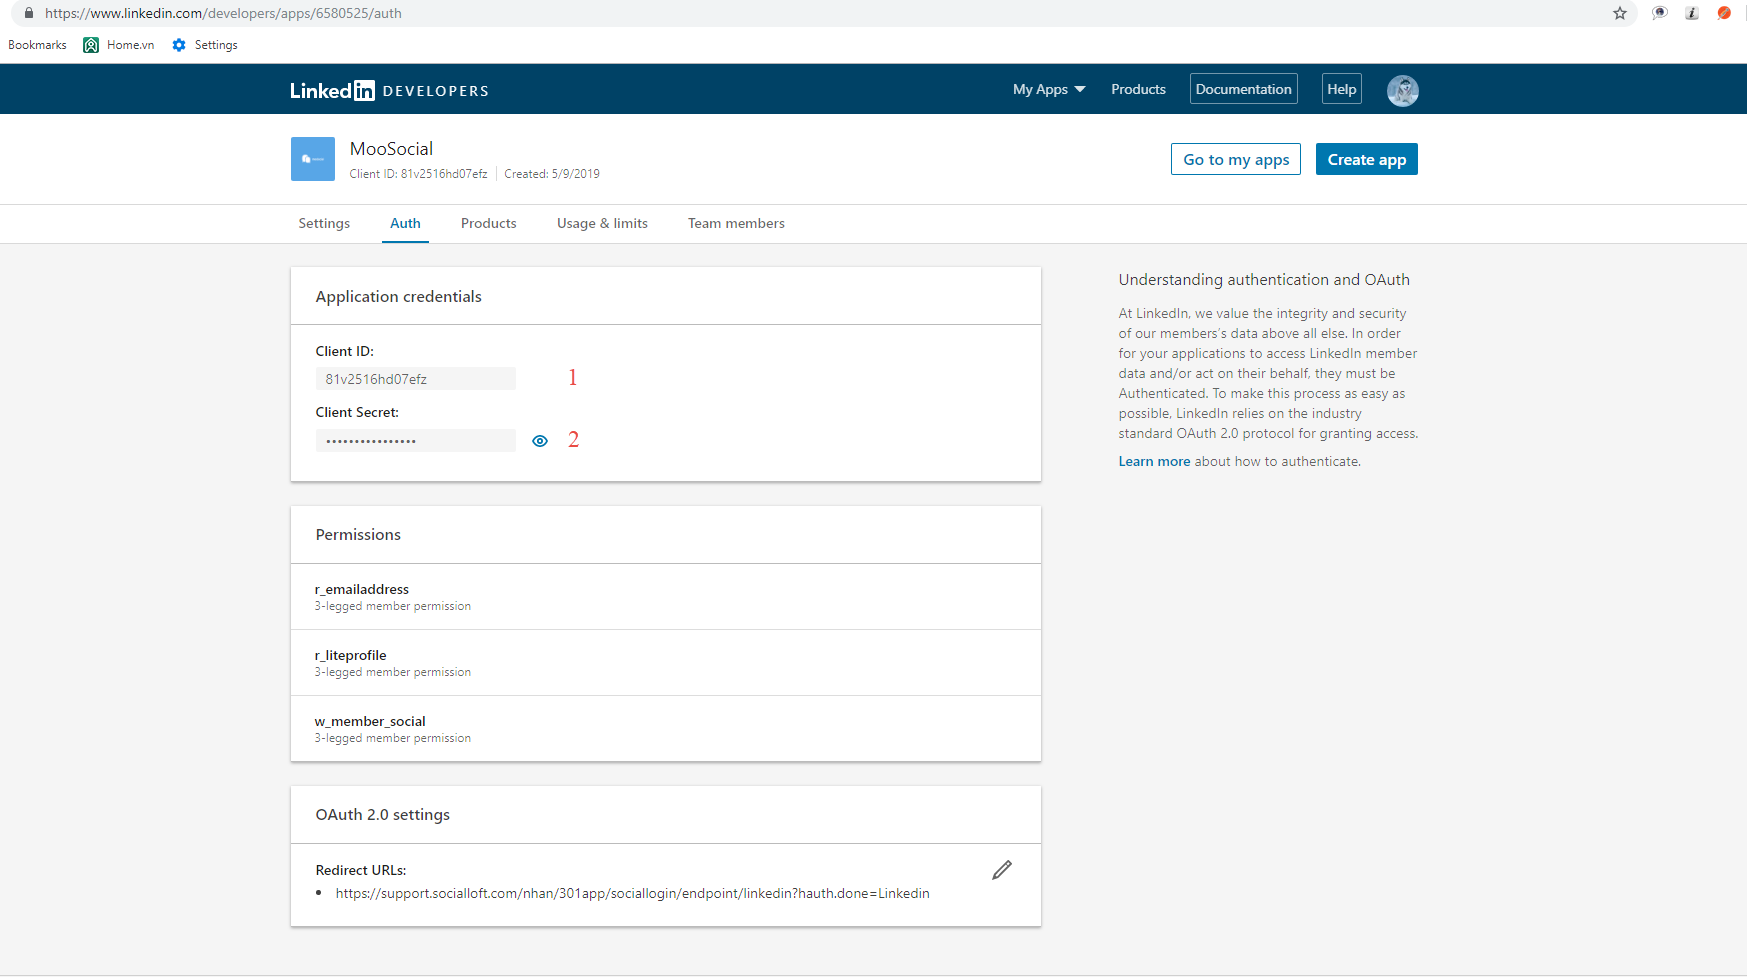
#1: Your Client ID from Linkedin (in your Linked app/ Authentication)
#2: Your Client Secret from Linkedin (in your Linked app/ Authentication)
Press Save Settings. Complete Linkedin integration process
*Remember to check if any space in the fields.
-------------------------------------------------------------------------------------------------------------------------------------------------
1. Go to https://developer.twitter.com/
2. Login --> Create an app
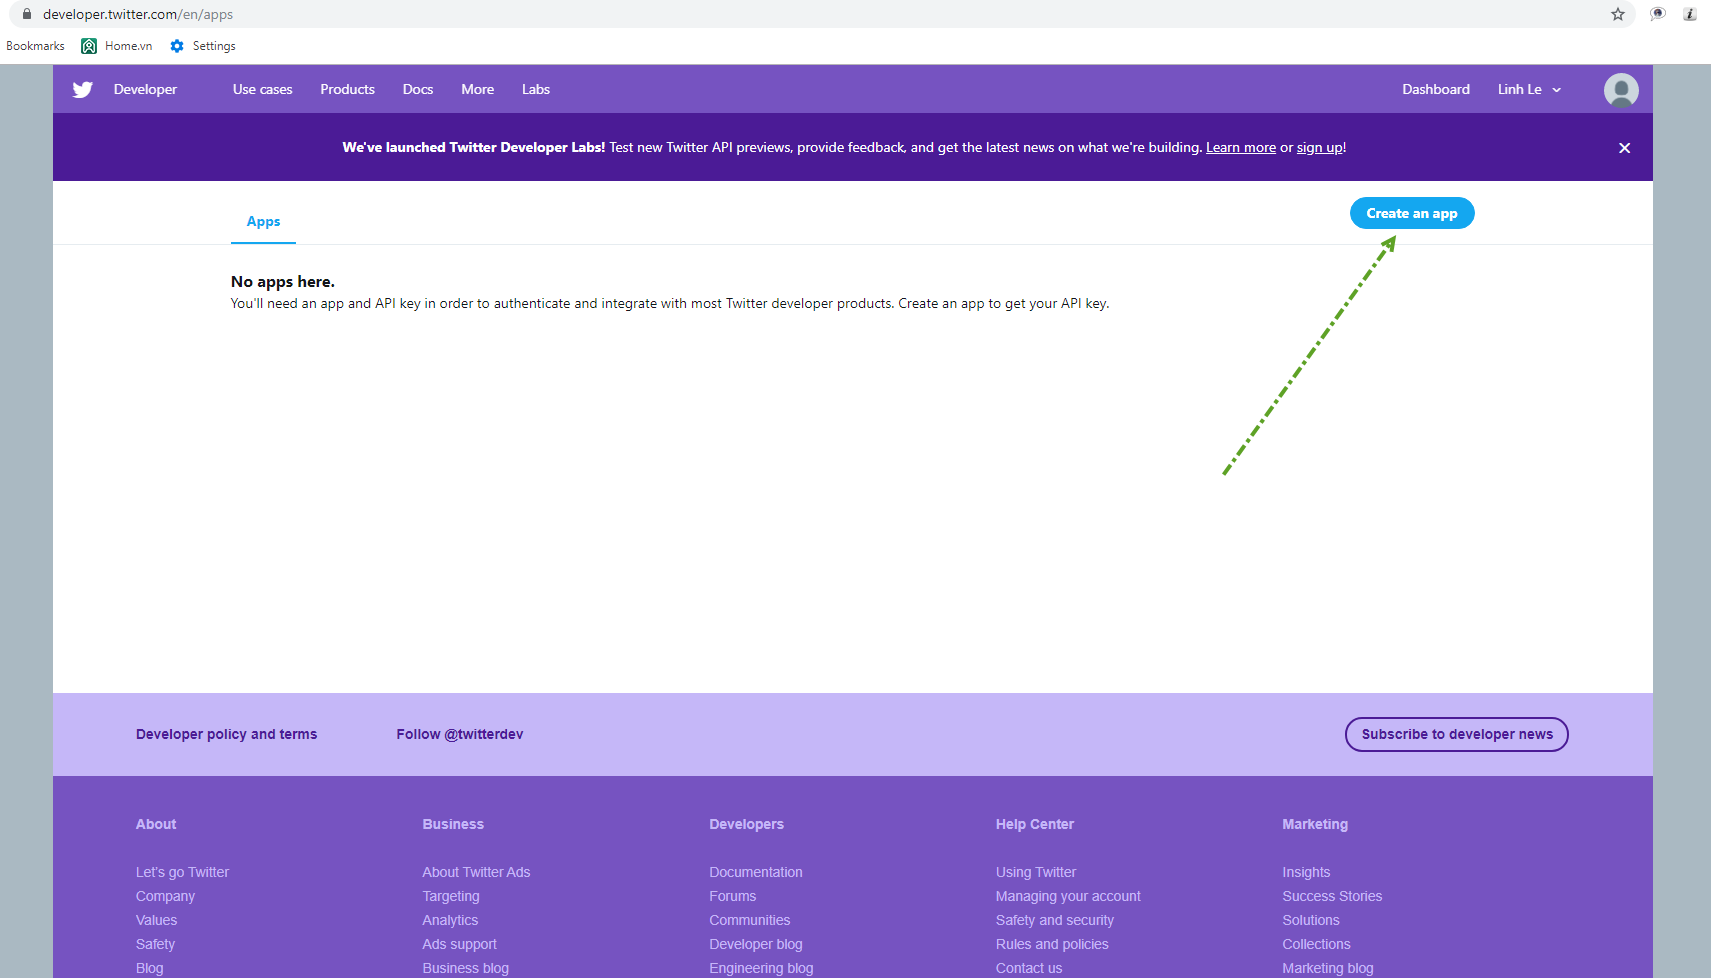
3. Complete information about your app
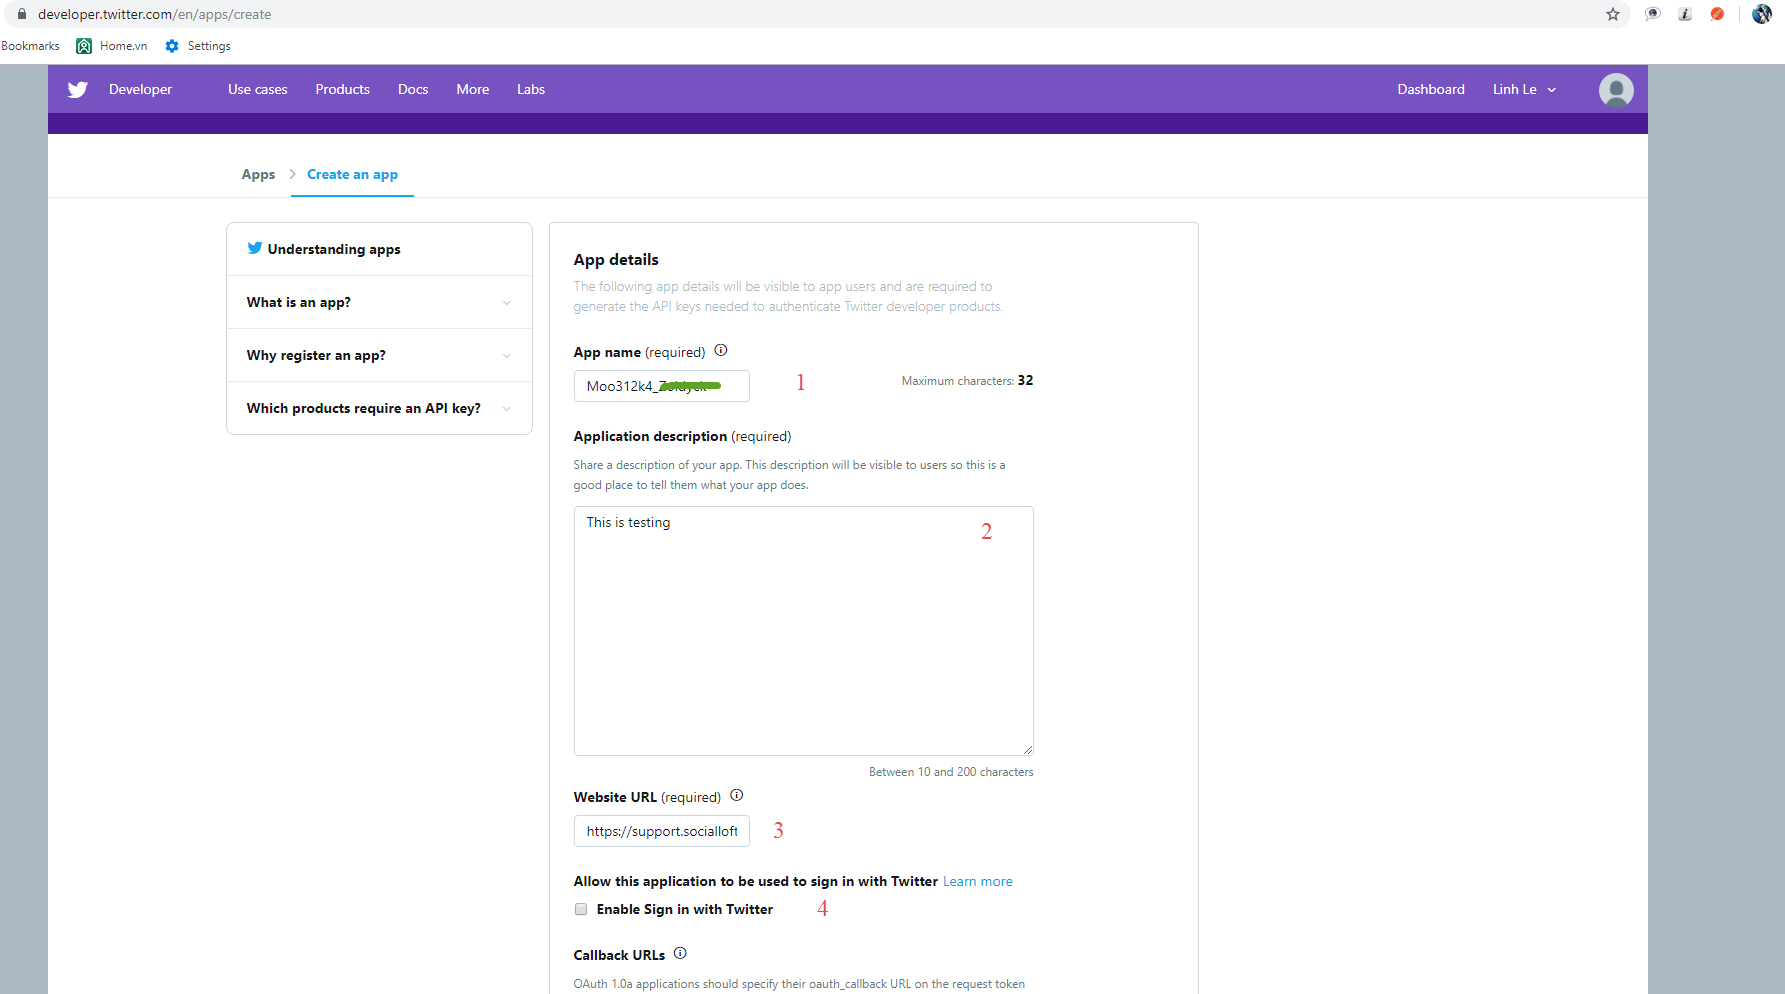
#1: Enter your app name
#2: Enter your app description
#3: Enter your website url
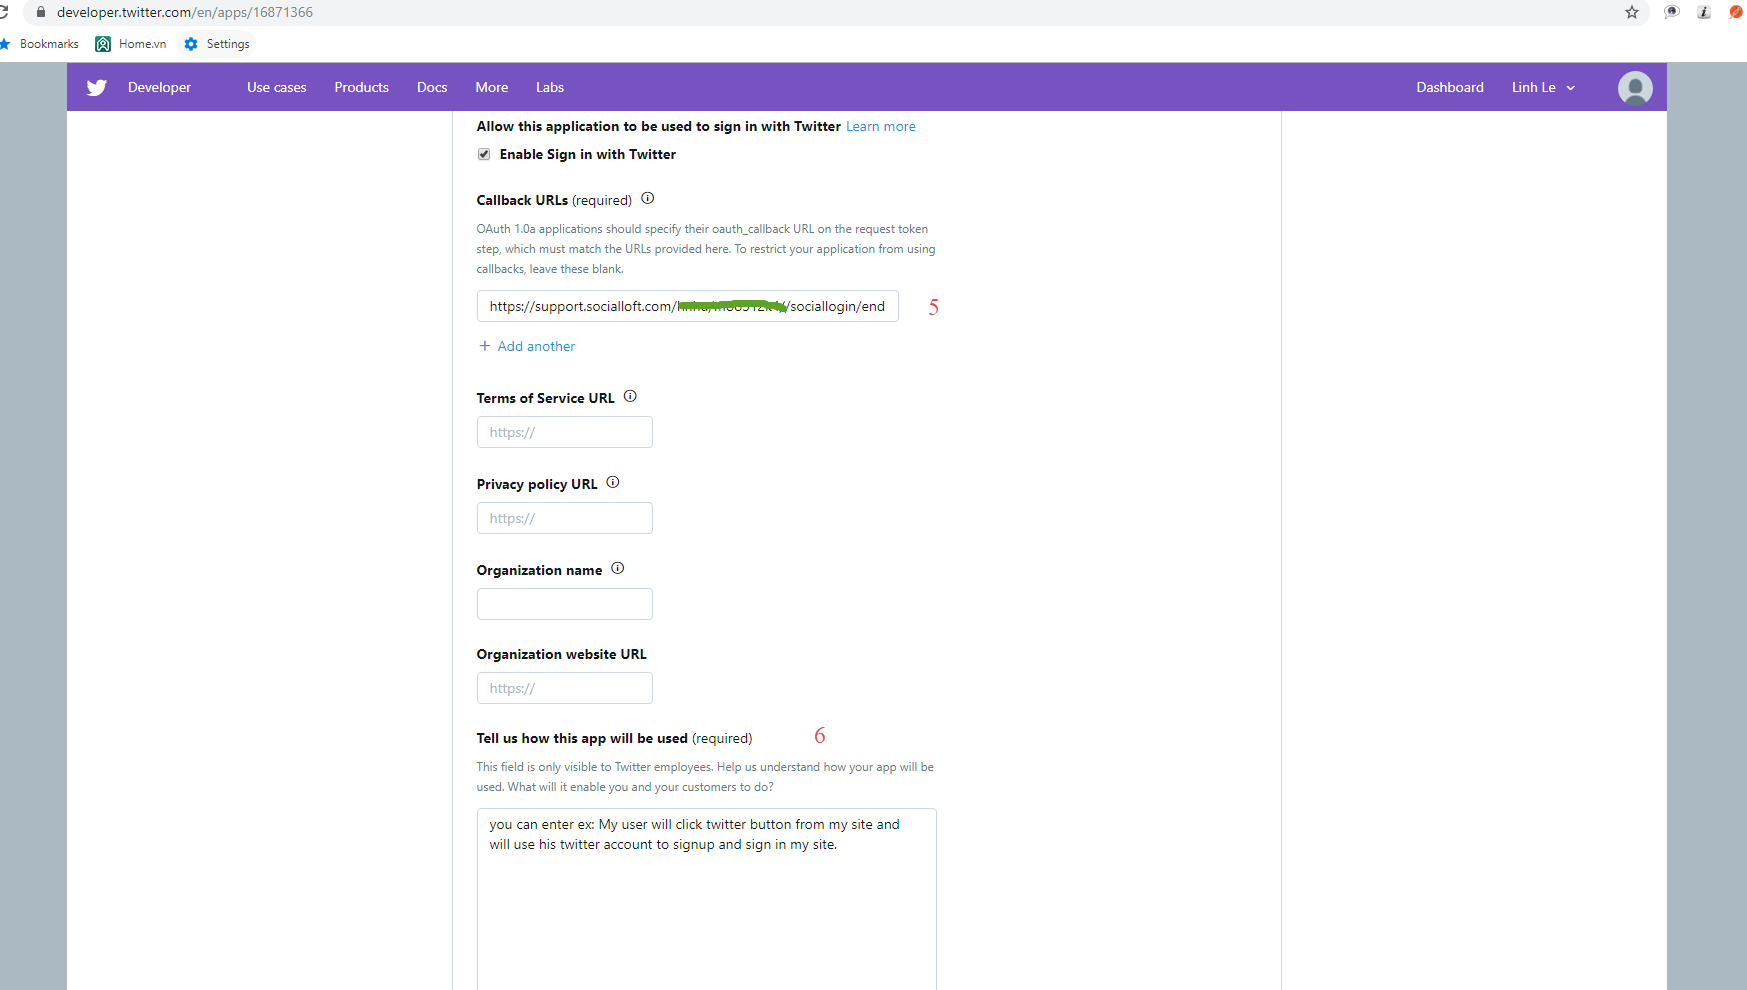
#4: Check "Enable sign in with twitter"
#5: Enter your callback's URL, this URL has the format: [yoursite/sociallogin/endpoint/twitter]
#6: Enter field "Tell us how to this app will be used": you can enter ex: My user will click twitter button from my site and will use his twitter account to signup and sign in my site
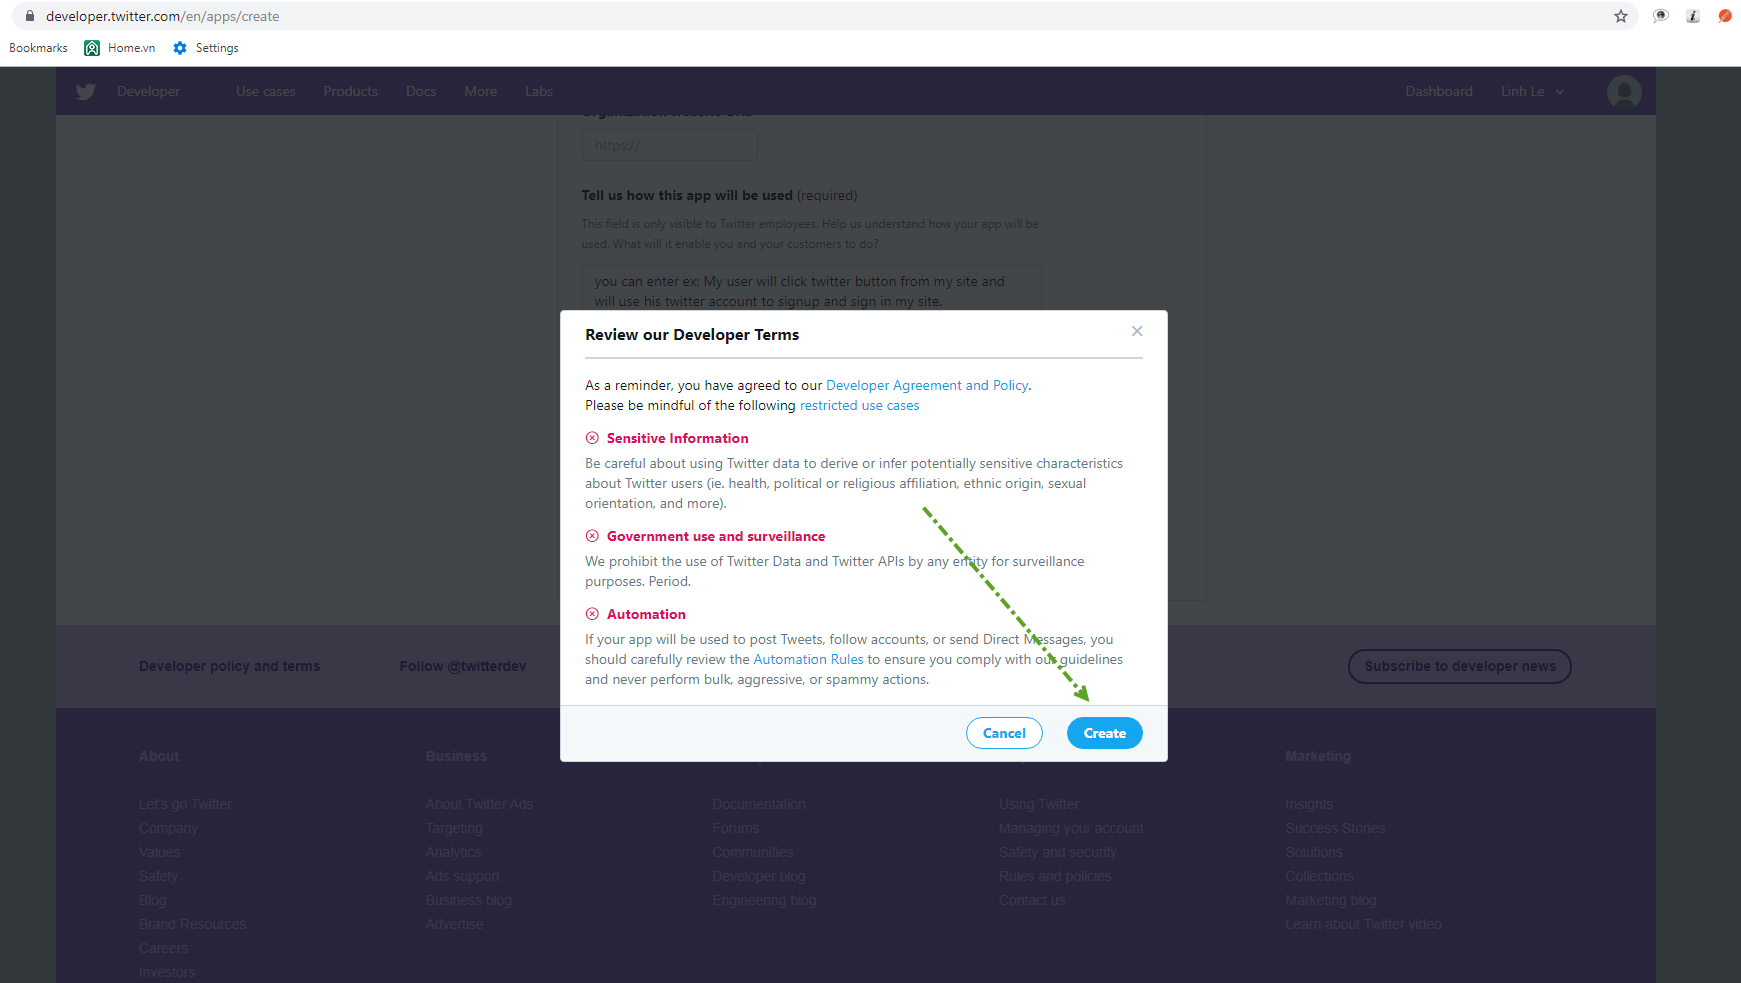
#7: Click Create button. Popup is displayed, then click on Create button.
Go to Permissions tab
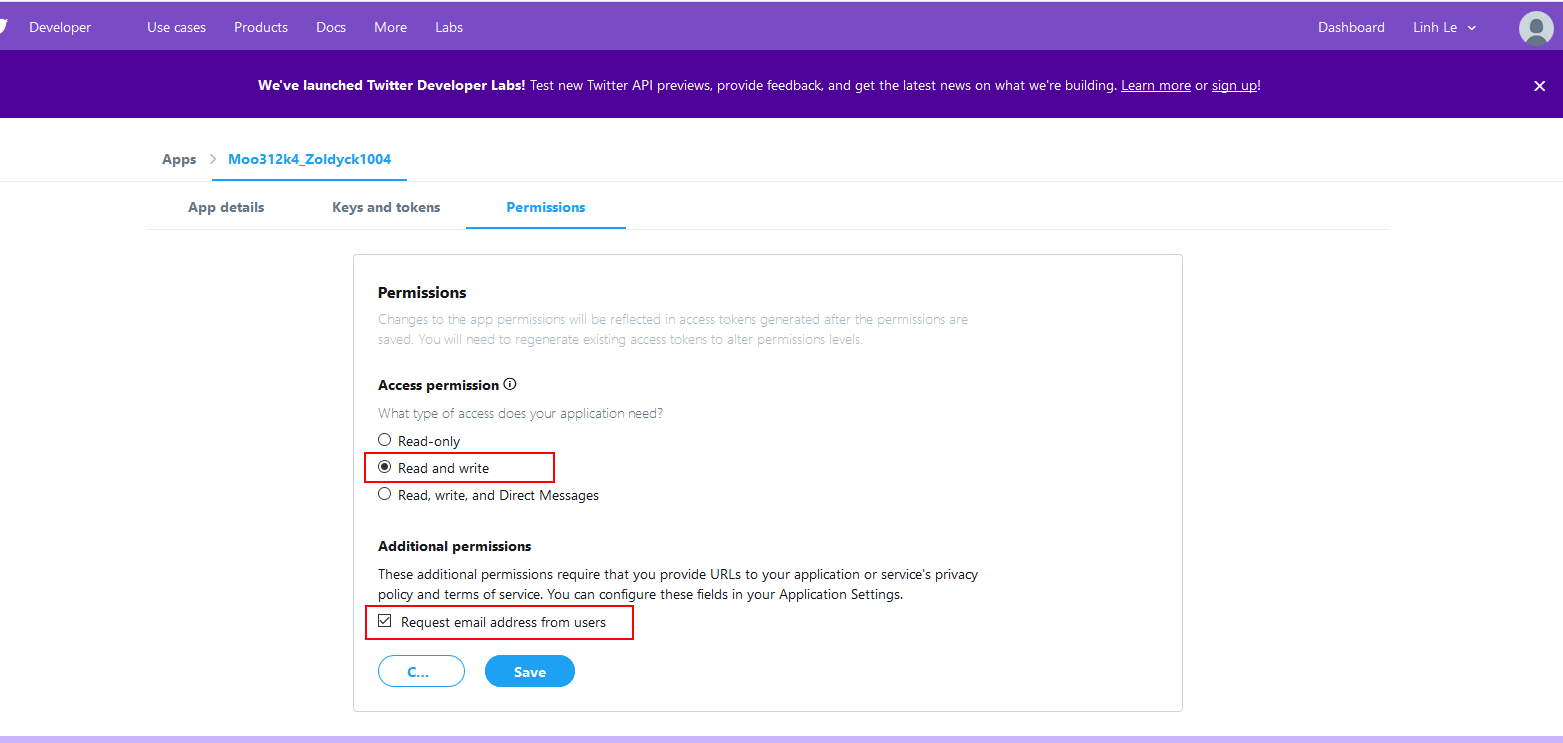
In "Access Permission" field select "Read and write"
In "Additional permissions" field check on checkbox "Request email address from users"
Then click Save button
4. How to configure your Admin Dashboard.
Go to Keys and tokens tab
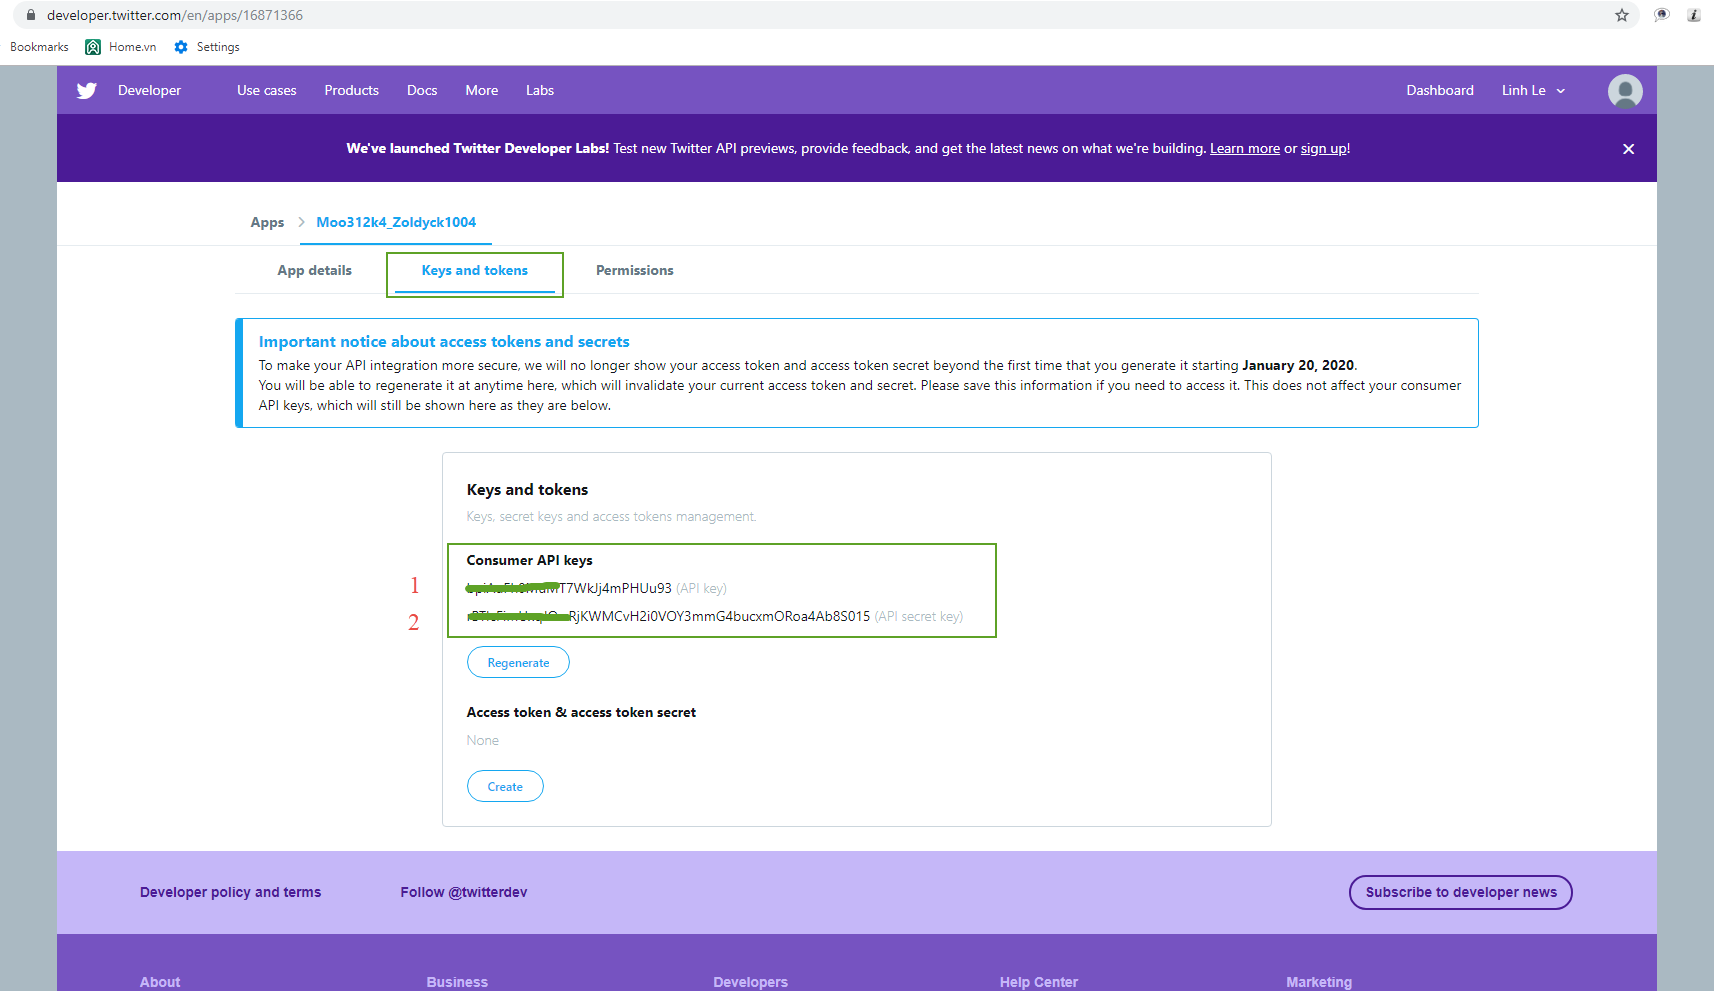
Go to Admin Dashboard/Social Login/Twitter
Get #1 and #2 from Twitter app and copy to your Admin Dashboard/Social Login/Twitter
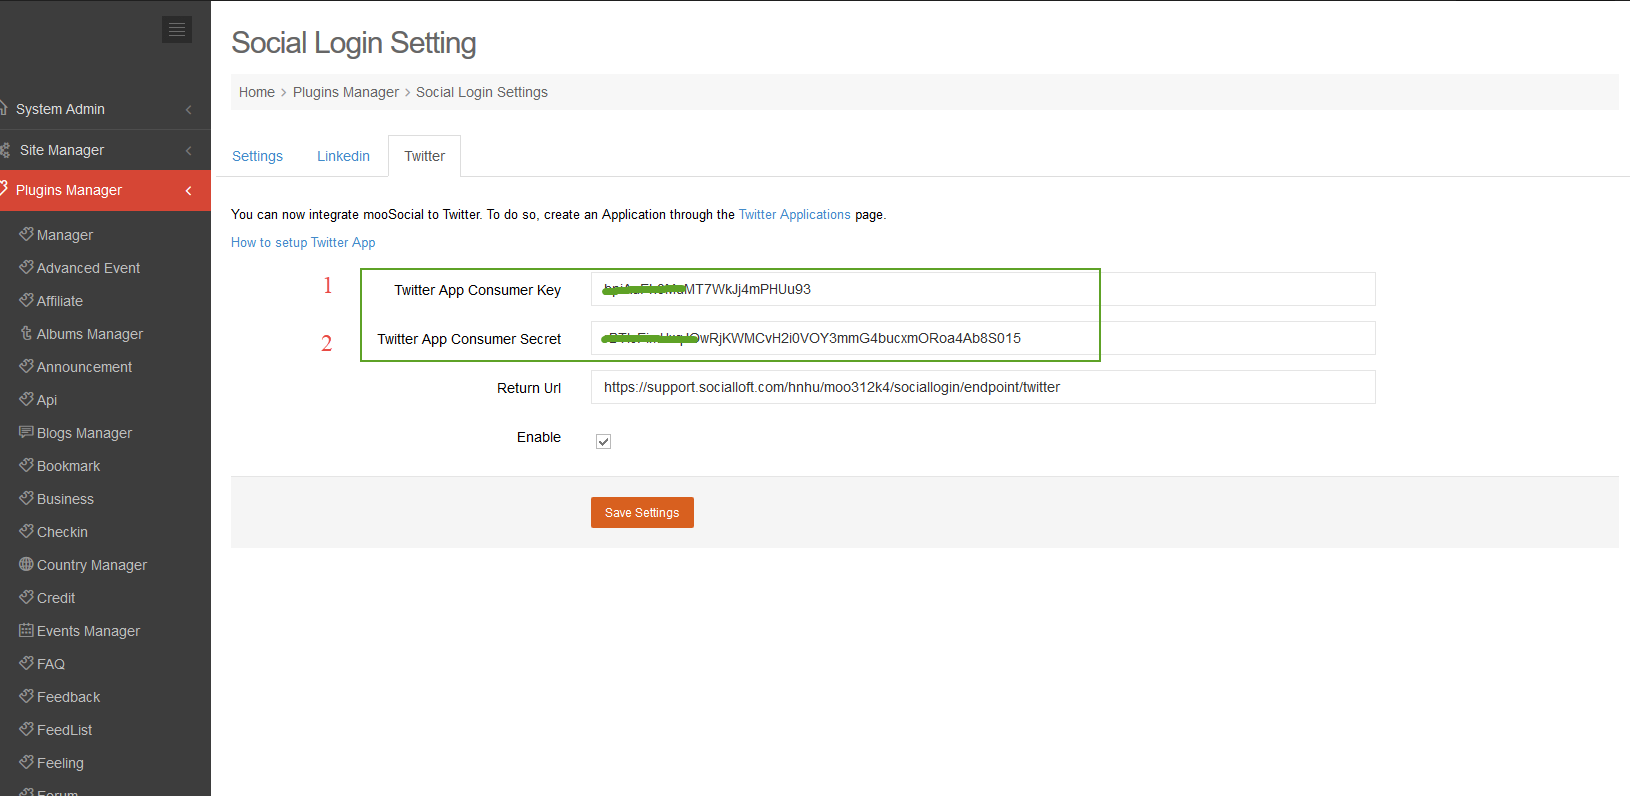
#1: Your Twitter App Consumer Key (in your Twitter app/ Keys and tokens/ API Key)
#2: Your Twitter App Consumer Secret (in your Twitter app/ Keys and tokens/ API secret key)
Return URL has format: [yoursite/sociallogin/endpoint/twitter]
Press Save Settings. Complete Twitter integration process
*Remember to check if any space in the fields.
